
This week we are continuing with Dave’s description of the process to create the timber beams and corbels for the Front Porch and Eyebrow Roof over the Garage doors. I’ll be back in the blogging seat next week to pick up where we left off on the progress at the house.
Here’s Dave again . . .
Porch 10×10 Beams
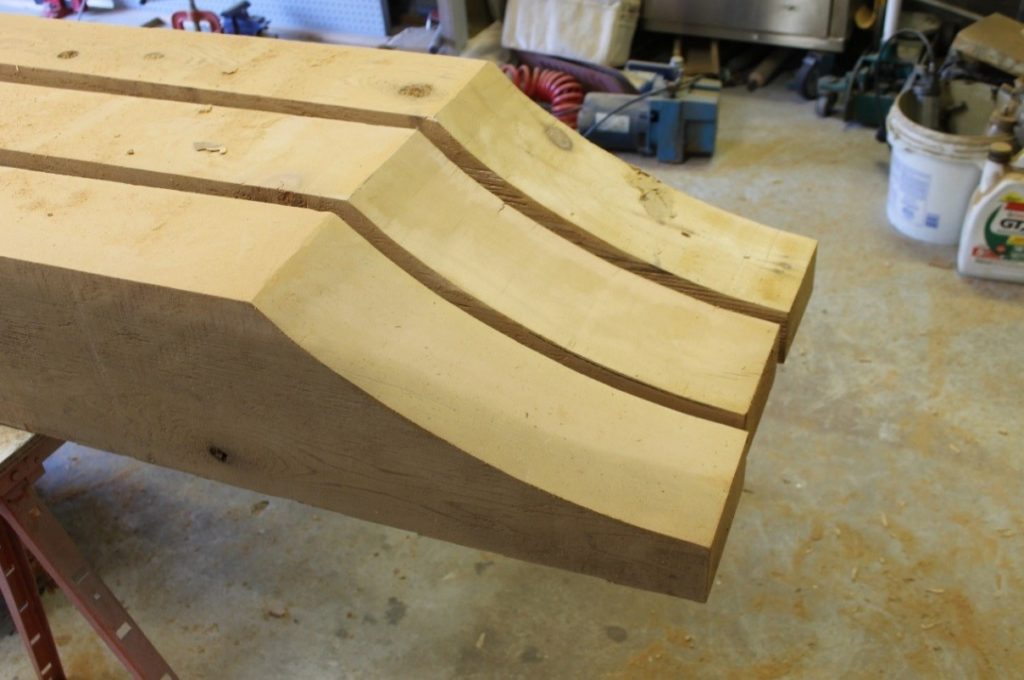
The Main Porch Beam consists of three 10’ long full dimension 10”x10” Western Red Cedar timbers (that’s about 175 lbs. each! – ed.). Two of the timbers had to be shaped on one end into a curved corbel. A full-size template was produced from the architectural drawings for consistency. The first step was to remove a wedge of material with two opposing cuts of a circular saw and then finish the remainder of the cut with a hand saw. This created a flat surface, or “bed” for the next step.
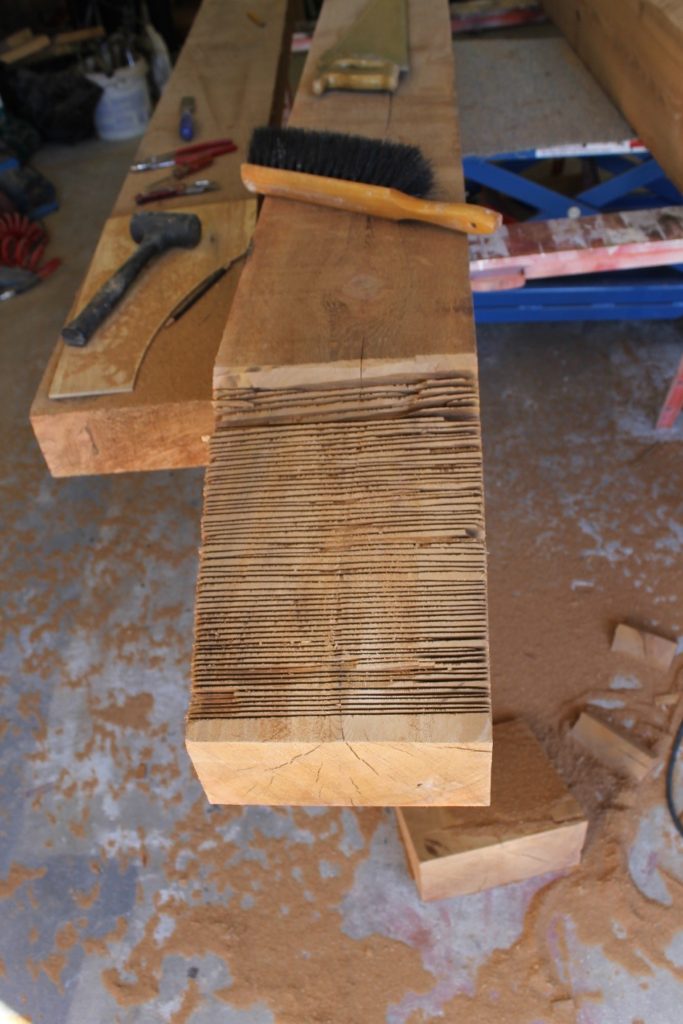
Then a series of “kerfs” were cut with a circular saw at varying depths. The kerfs were then chipped away with hammer and chisel.
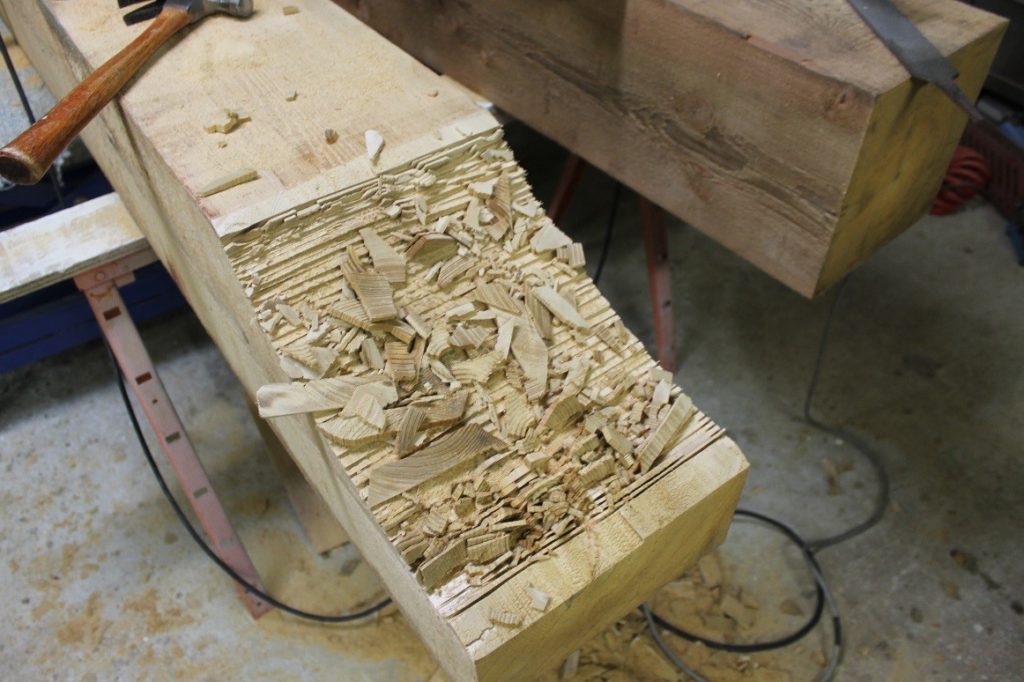
The rest was shaped with a series of grinders and sanders.

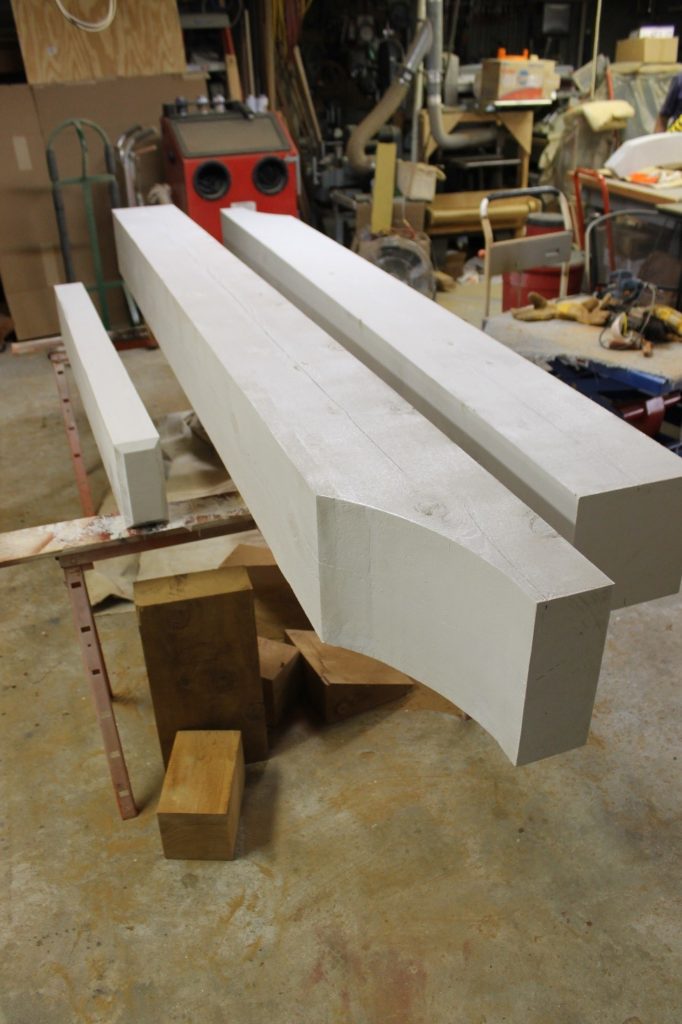
The sides were then smoothed with a draw knife and a series of progressively finer sandpapers.

The surfaces were then primed with an acrylic based Kilz paint and allowed to cure.
Porch Gable Beams
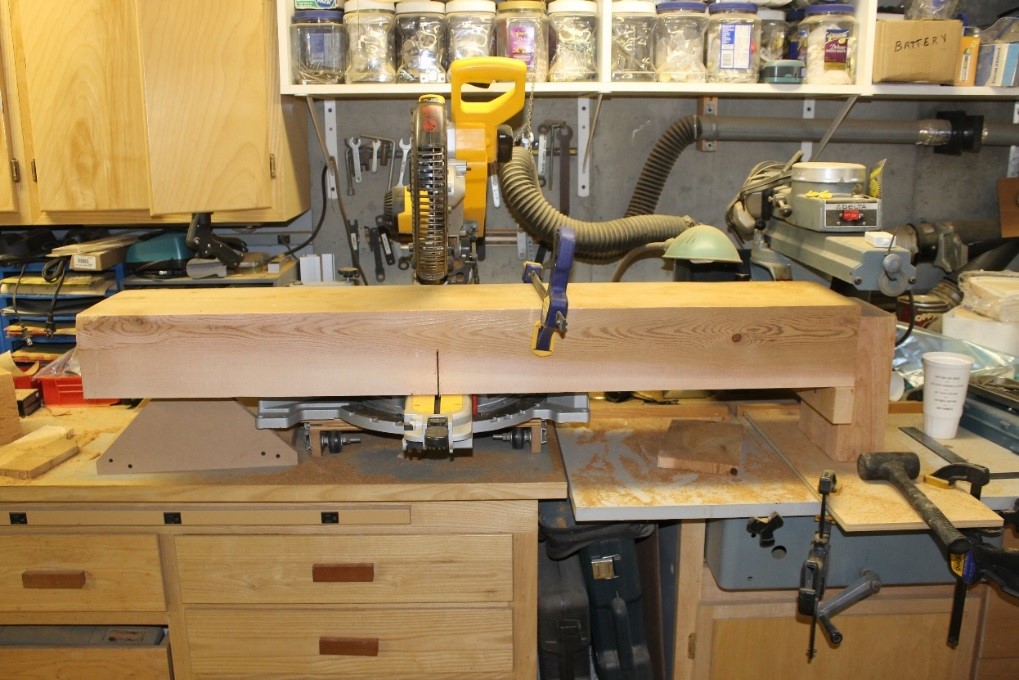
The three Porch Gable Beams, that are perpendicular to the front of the house, were shaped from three 8’ long 6”x10” full dimension Western Red Cedar timbers. The timber end and cut location were chosen to avoid any large knots or grain that had potential for severe checking. A new full-size template was created from the architectural drawings.
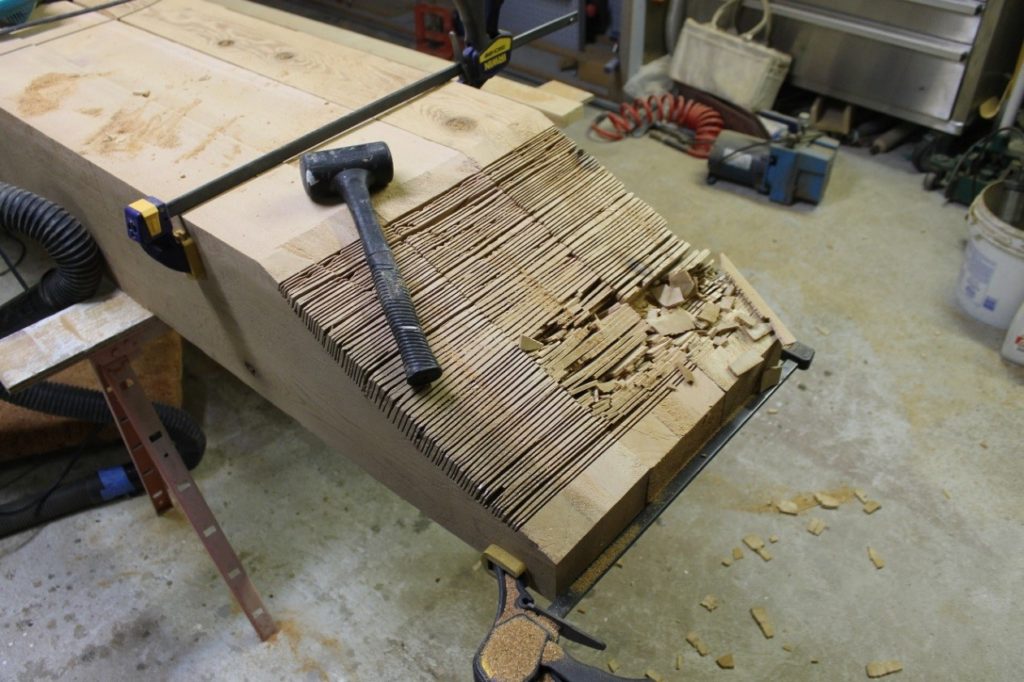
The beams were first “chopped” at an angle with a circular saw from opposite faces to remove as a wedge of material and to provide a flat surface for the next step. The three timbers were aligned and clamped together to maintain consistency in the shape of the corbel. We then “snuck up” on the curve by cutting a series of kerfs with the circular saw at varying depths and “chipping out” the pieces with a hammer and chisel.
The curves were then “trued up” with chisels and sanders to reach the final curve. The rough-sawn sides were smoothed with a sharp draw knife and sanded with 80 grit sandpaper to remove most of the roughness but retain some of the grain of the wood to be revealed when painted.
The nine Garage Corbels
 The 6”x10” timbers forming the corbels over the garage doors were chopped square and to length with a pair of corresponding cuts on opposing faces of the 6×10.
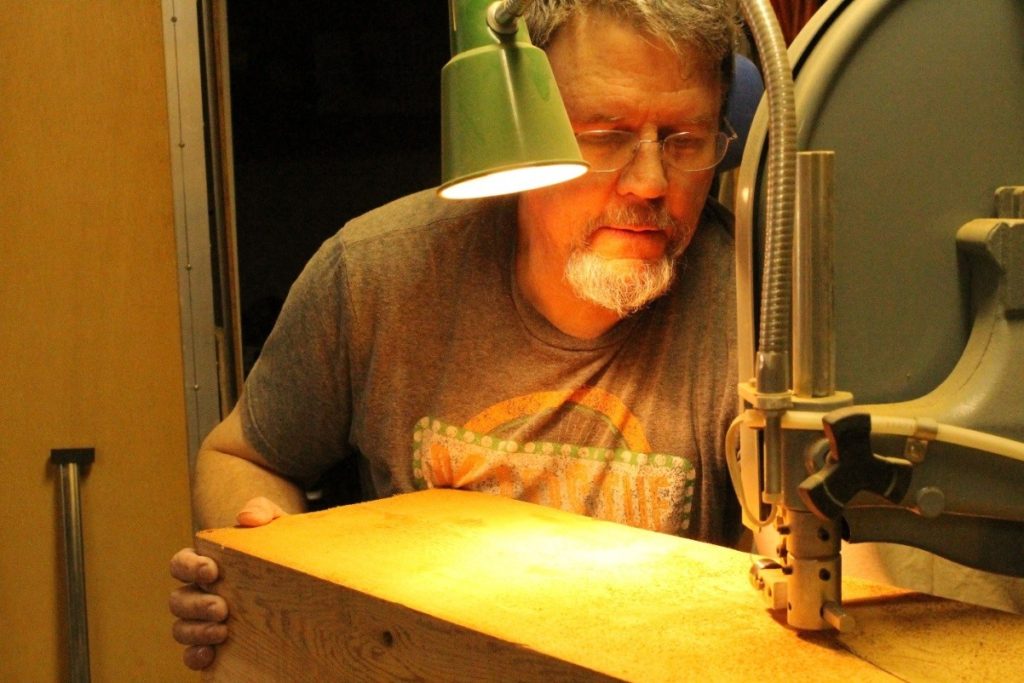
The 22” long pieces were of a manageable length to shape the curve of the corbel with a band saw. The Band Saw was modified to be able to allow a 6” high piece of material to pass under the guide arm with just a ¼” of clearance.
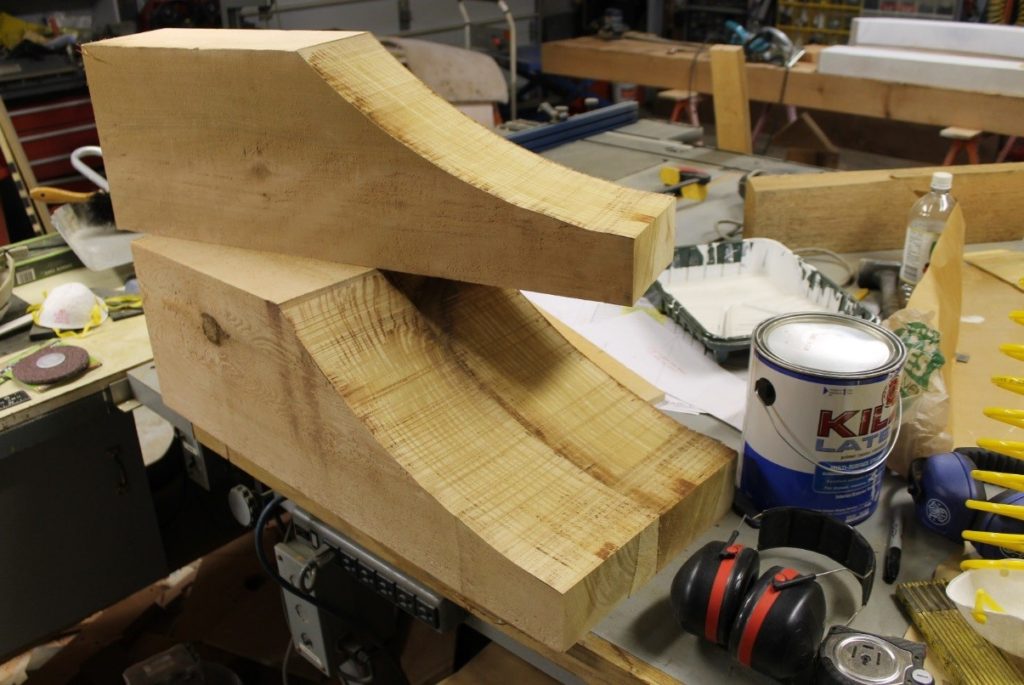
Above is a photo of the corbels after the curve was “roughed out” on the band saw. They were allowed to dry out for a day before sanding to the final shape and smoothness. The sides, top and bottom were smoothed while retaining some of the relief of the wood grain.
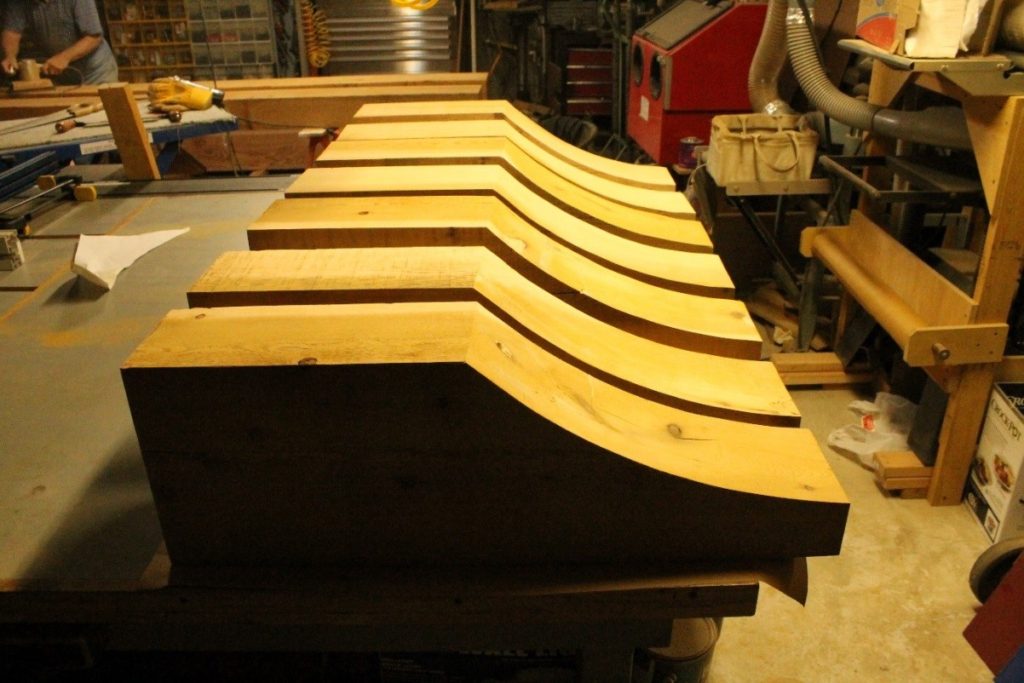
The sanded corbels before priming with an Acrylic based Kilz paint.