Work continued on the back Deck this week. Once the decking was all in place, it was time to get the railings installed. They also put in the permanent column at the corner of the porch roof so we don’t have to rely on 2×6’s to prop it up anymore. 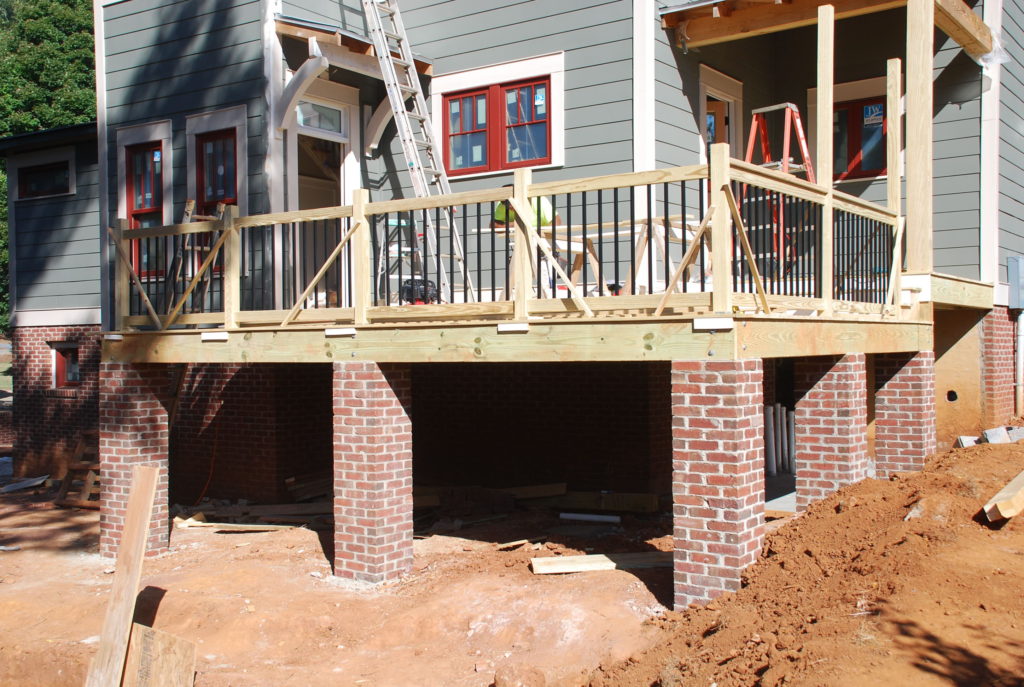 The masons were also there to get the brick up around the pressure treated posts so it looks like we have structural brick piers supporting the deck.
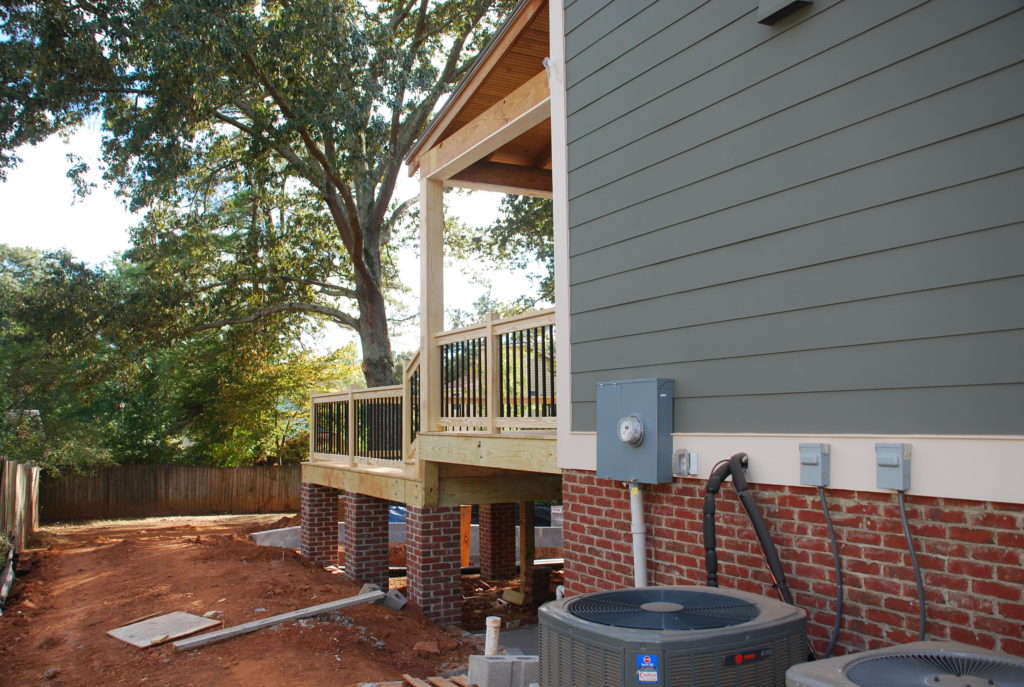 Now that the railings are in place you can see better how the deck steps down behind the porch roof. It has a nice appearance from the front/side of the house.
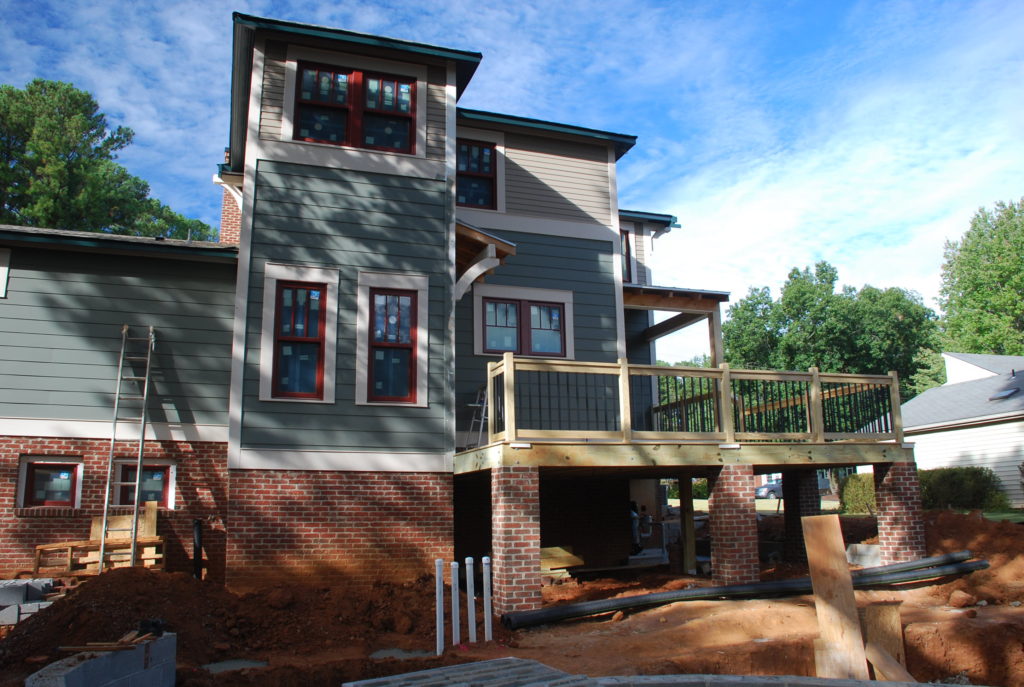 The railings are all in except for where the steps will go down to the grade. Next they will build the landing and steps down to it – hopefully next week.
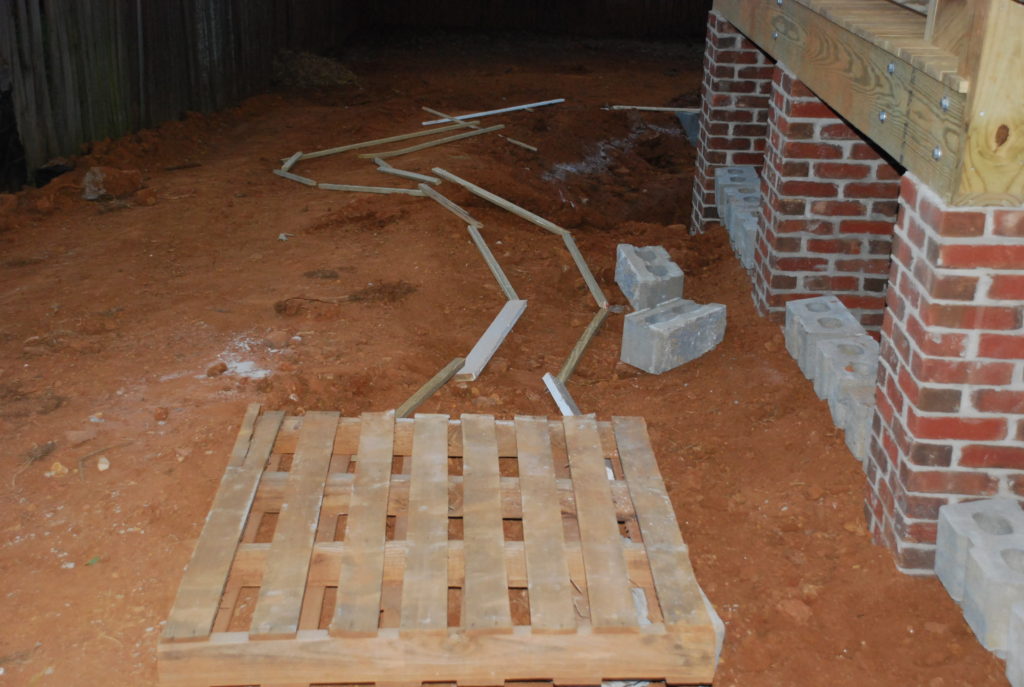 We’re starting to concentrate on the water source for the pond and how that is going to work. The idea is to create a small pond up by the side of the deck where the water will be piped. We’ll plant it with ‘bog plants’ and the water will flow down from that pond through a ‘stream’ to a waterfall structure where it will fall into the pond. Here is a pallet roughly in the place where the upper pond will go and boards showing the basic form of the stream. It all serves to help us visualize how it will work.
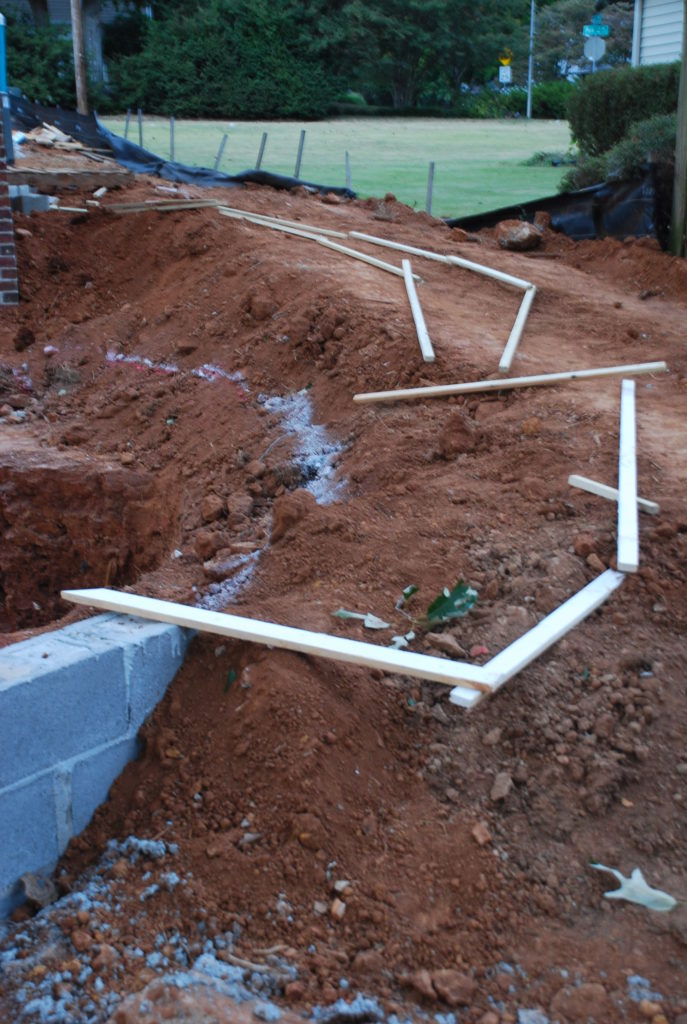 This photo is taken from below with the future waterfall in the foreground, looking up toward the stream. You can see that we’ve built up the area a good bit to create the vertical drop that we’ll need for the water to fall into the pond.
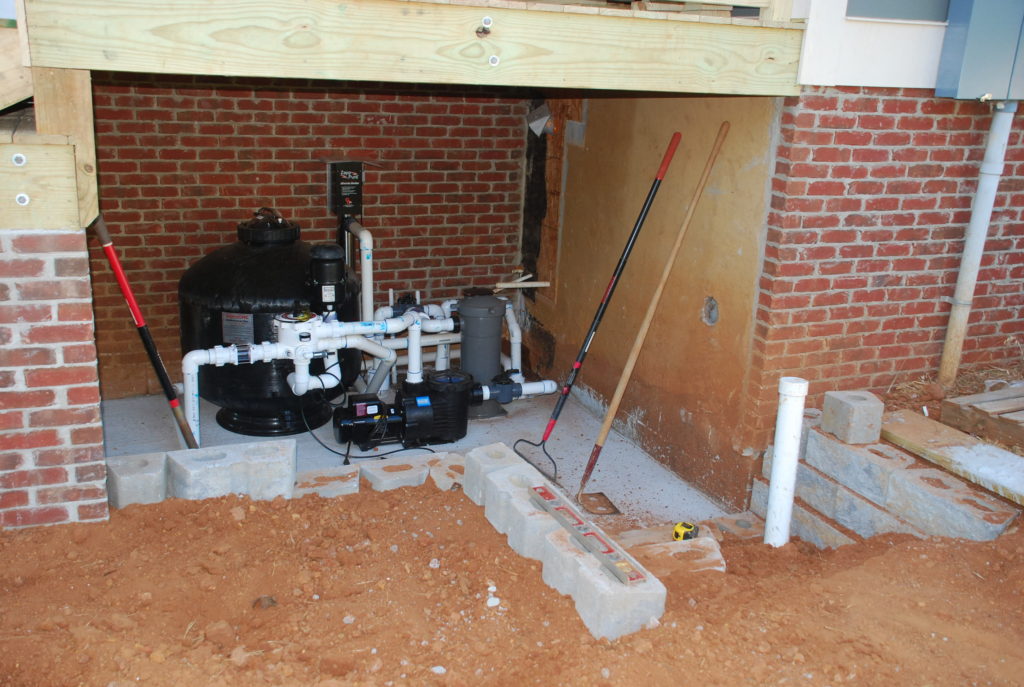 Also this week we were able to get the slab poured for the pond equipment and the pond guys came right away, set the equipment in place and got most of it all plumbed. Next we’ll need to continue with the block wall to raise the ground some more for the upper pond to be at the right level. On the right side we will have steps down to a gate so we can get in to access the equipment.
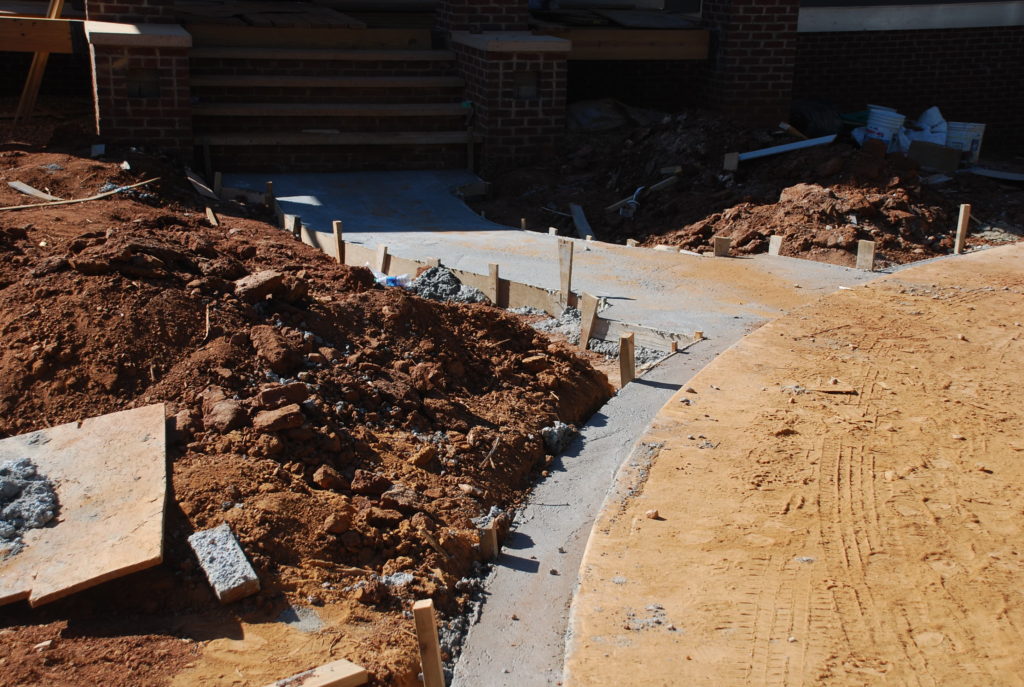 Around front, we’ve decided to add a brick edging for the driveway and have poured a concrete base for the pavers that will go there. At the same time we had them pour the base for the walkway to the front Porch.
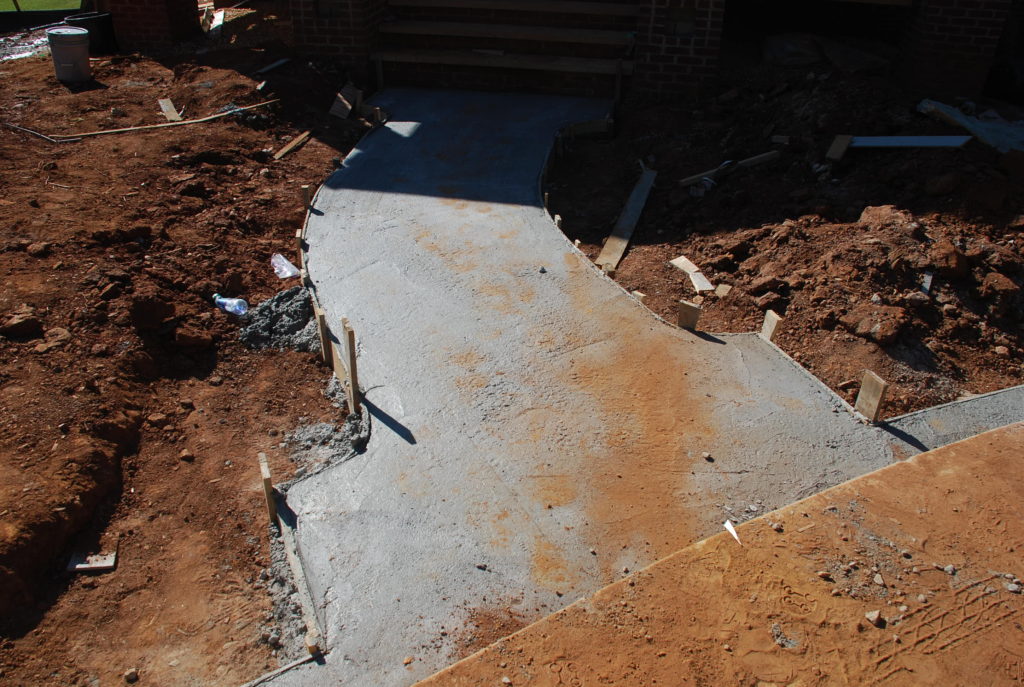 Here’s a better view of the shape of walkway. The dirty area at the bottom of the walkway is actually the driveway slab. Once we get the dirty stuff wrapped up, a good pressure washing will make it look as good as new (we hope).
 We wanted the Front Porch to have tongue-and-groove deck boards like a hundred year old house would have had originally. Normally they would be painted and that requires a lot of maintenance, so we looked for options. We decided to use an exotic hardwood called Tigerwood – similar to Ipe, but it has a more interesting grain pattern and is a good bit less expensive.
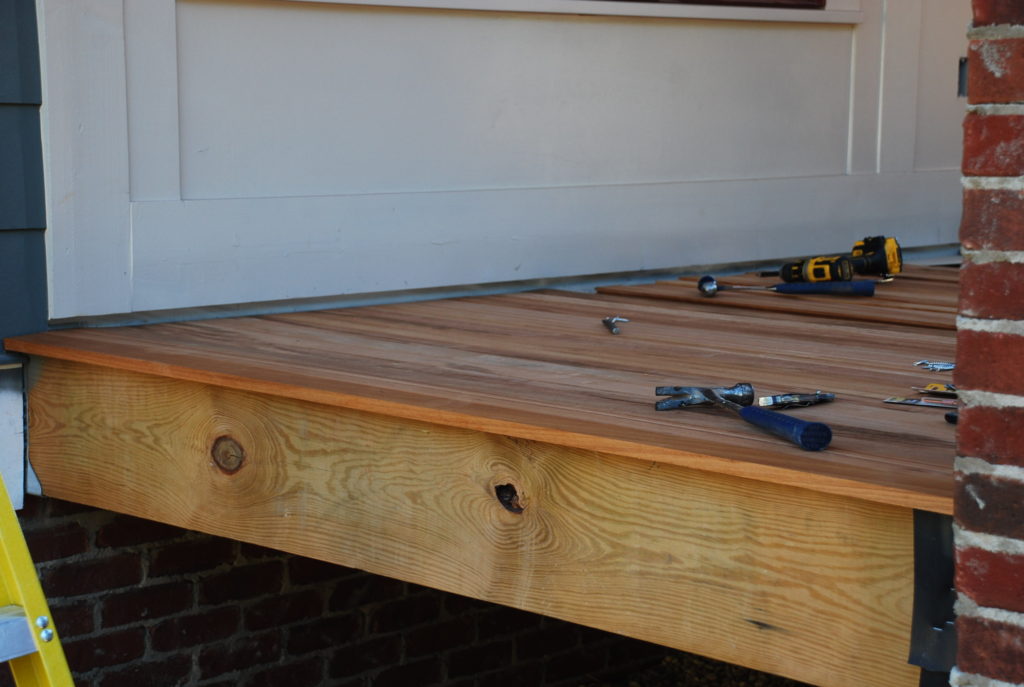 It requires an oil finish and not much maintenance beyond that. Being a hardwood, it does require pre-drilling all the holes, but Clint got the hang of it pretty quickly and before too long, he had a good start on getting it done.
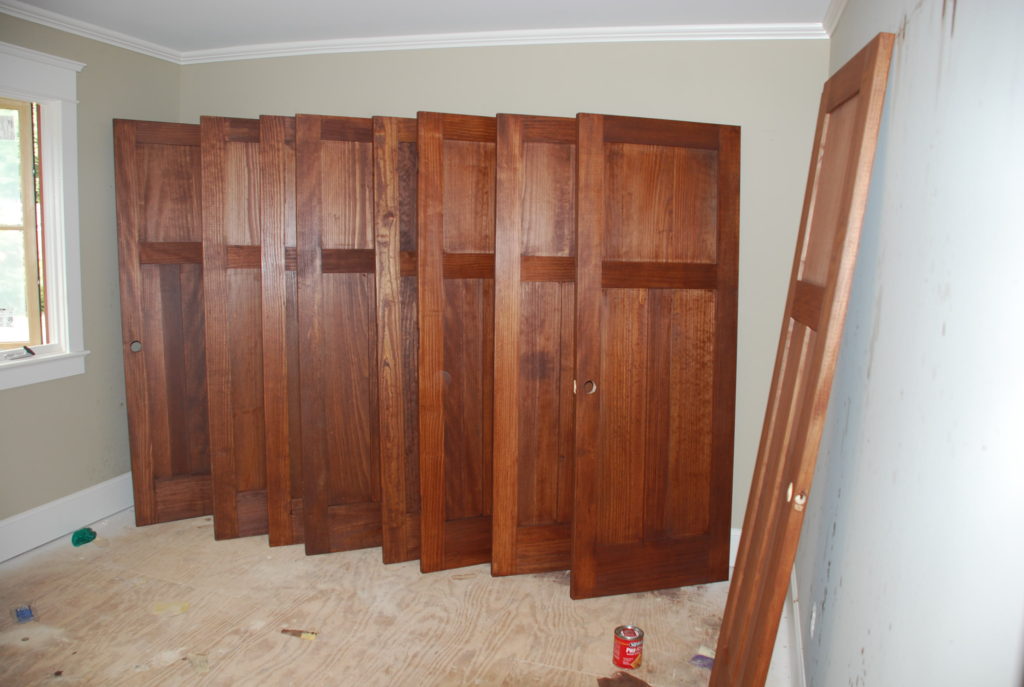 Meanwhile our painter was working inside. Our plan is to stain the interior doors and all the window sashes to match the color that we are using for the exterior doors. The problem is that the front door is made of Red Oak, the back doors to the deck are made of Fir, and all the interior doors and window sashes are Pine. In addition, being a softwood, pine absorbs stain differently than hardwoods and requires quite a bit of preparation before it acts properly. We did much research and tested several methods before settling on one that we were pleased with. Above are the doors for the upstairs area all stained and ready for polyurethane. All things considered, they are turning out great.
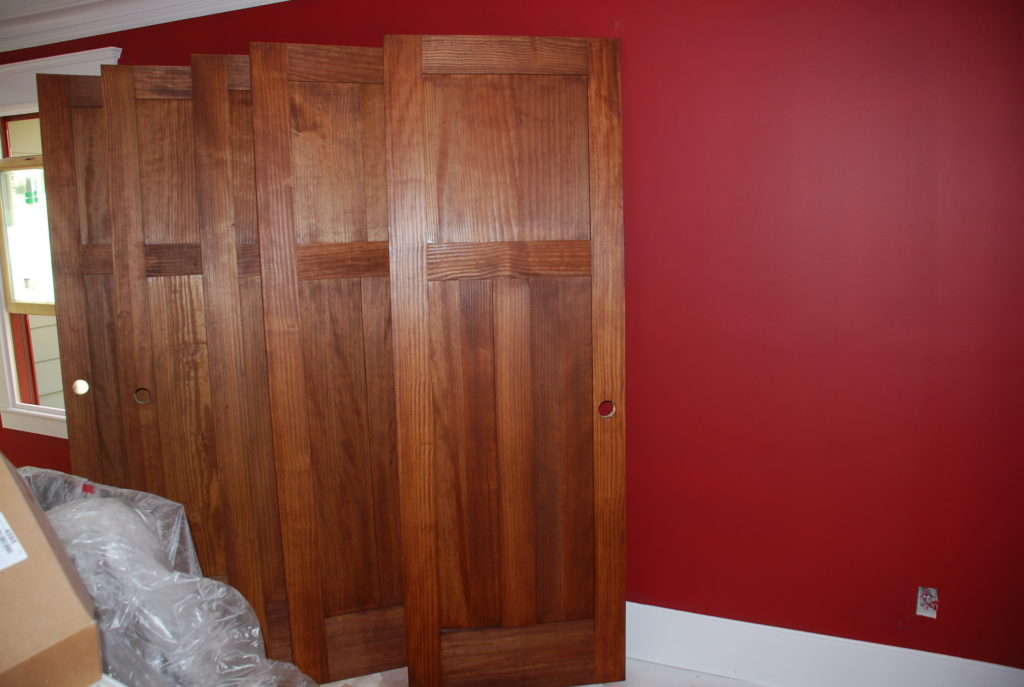 Here are some of the doors for the First Floor.
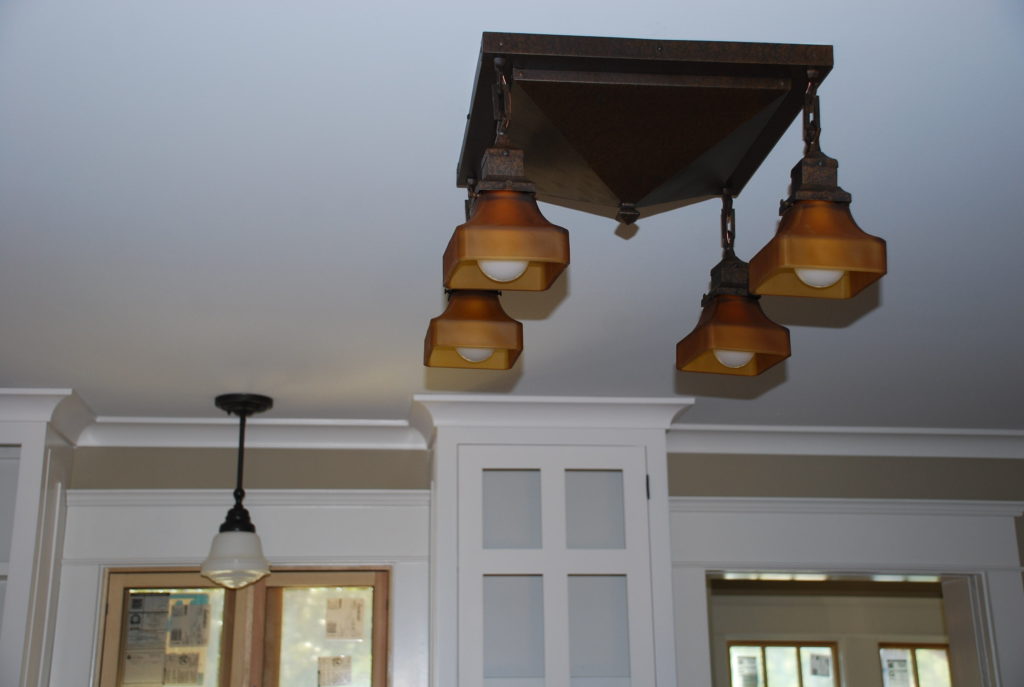 Guy, our electrician also had his crew hard at work this week. We overshot our budget on light fixtures in order to make the house look as authentic as possible. This fixture in the Kitchen over the island has a bit of a medieval look to it – which was very common in the Arts & Crafts era. We also love the small schoolhouse type fixture over the Kitchen sink – back by the window.
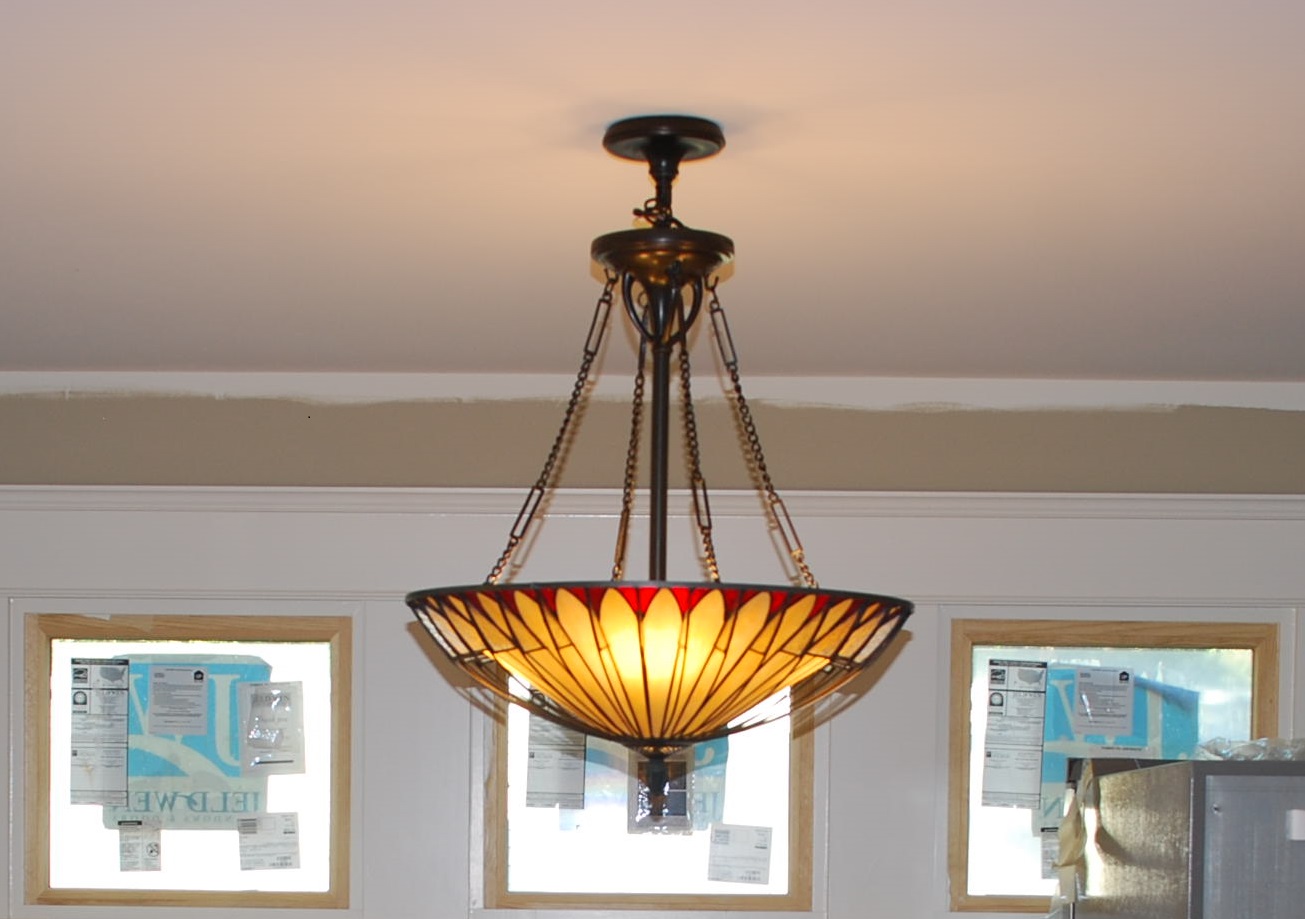
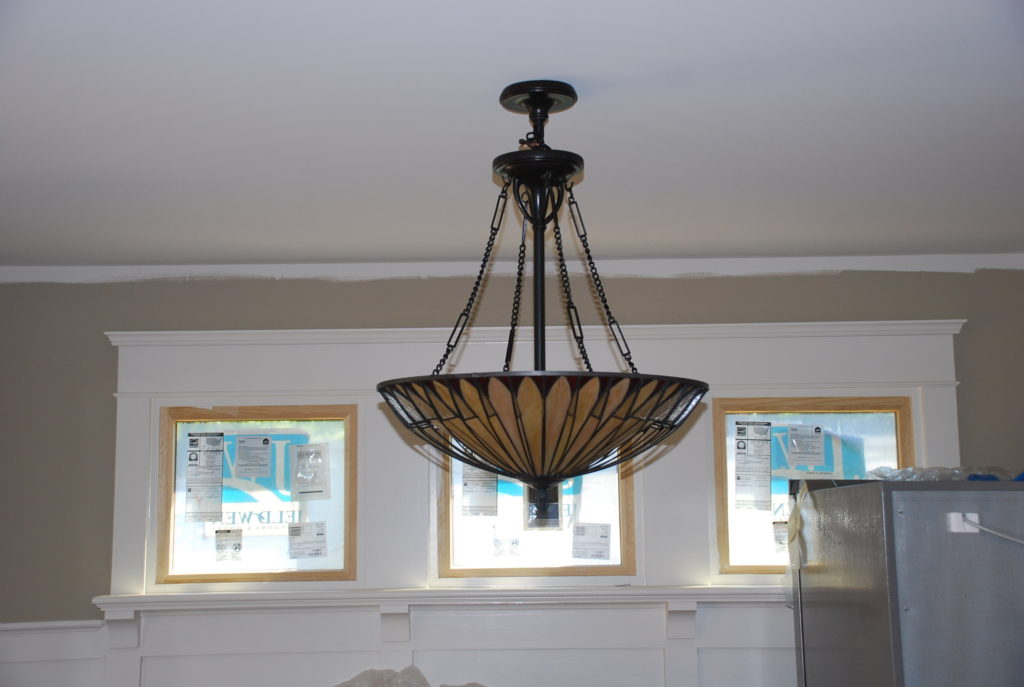 This fixture hangs over the Dining table and has beautiful colors when lit (see the top photo for this blog).
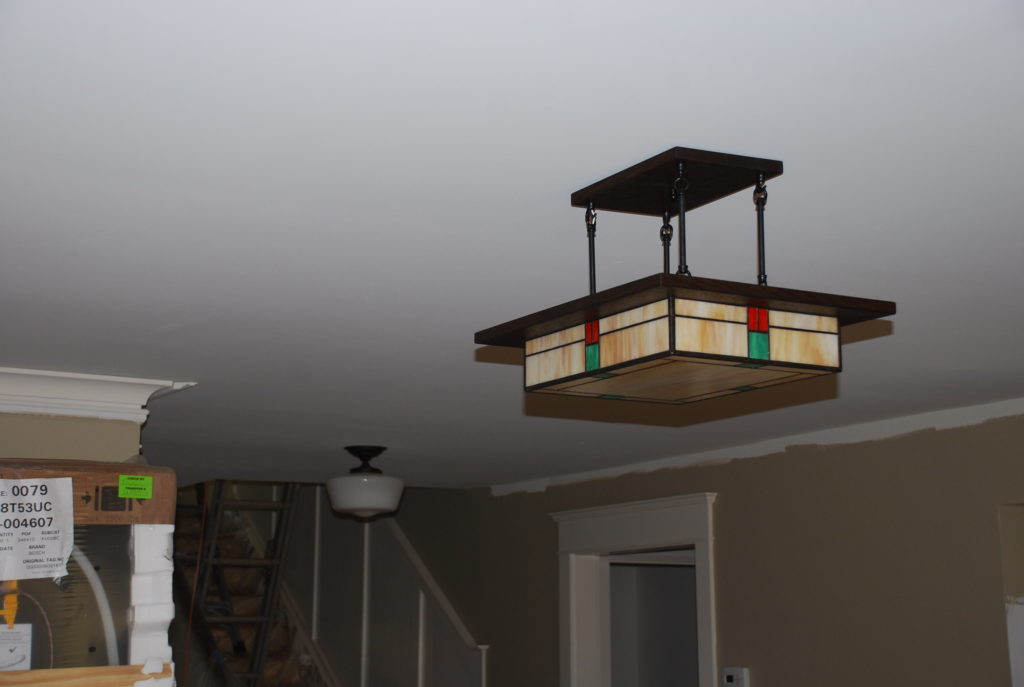 This fixture in the Family Room is made with wood and stained glass and brings in some of the colors that we are using in our furnishings.
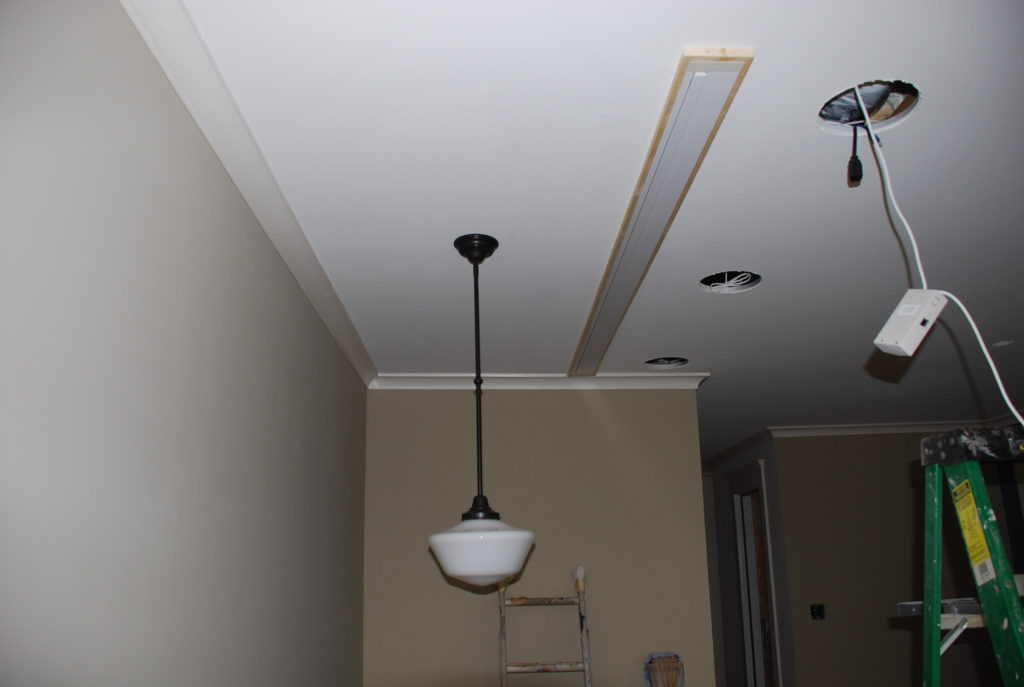 Over the main stair is this dropped schoolhouse fixture which can be turned on from below or above the stairs. We also got the projection screen installed in the ceiling which will be used for our ‘Media Room’ use of the Loft. Tom and Andrew temporarily wired it up just to make sure it worked.
 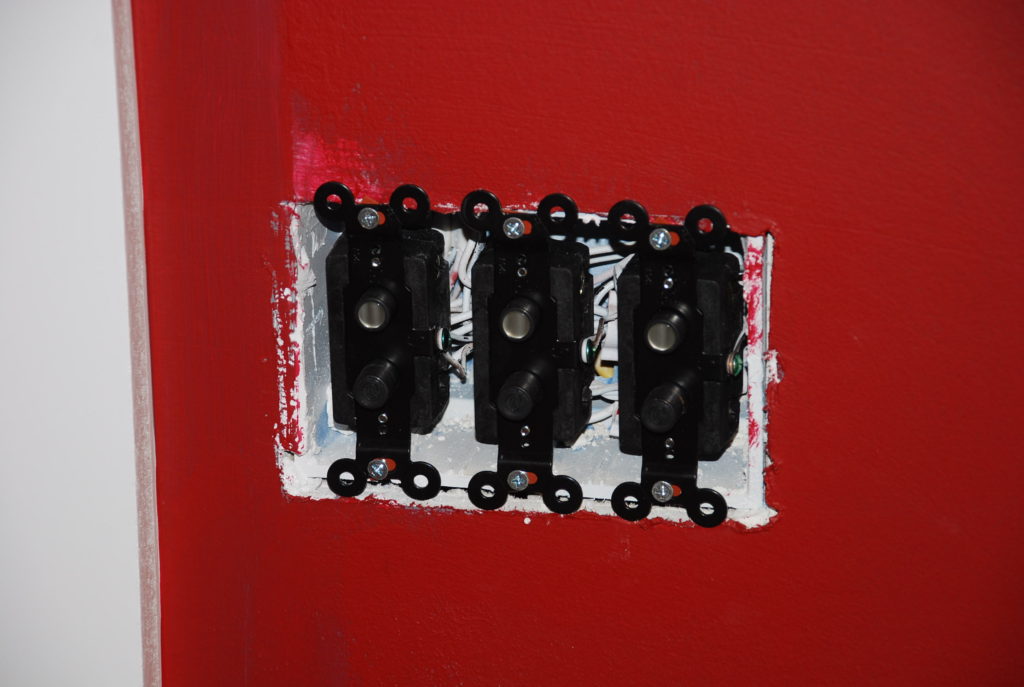 If you’ve ever been in an old house or building from the early days of electricity, you may remember push-button switches for the lights. They were very common in the early 1900’s before toggle switches became the norm. We decided to splurge and go with them for most of the house – and here are three lined up in the Master Bedroom. They’ll have oil-rubbed bronze cover plates to finish off the look.
Next week we anticipate more progress with these same items as well as a few more. Hopefully we’ll have our trim/built-in guys back with more to show, as well as a new subcontractor here to install the gutters.