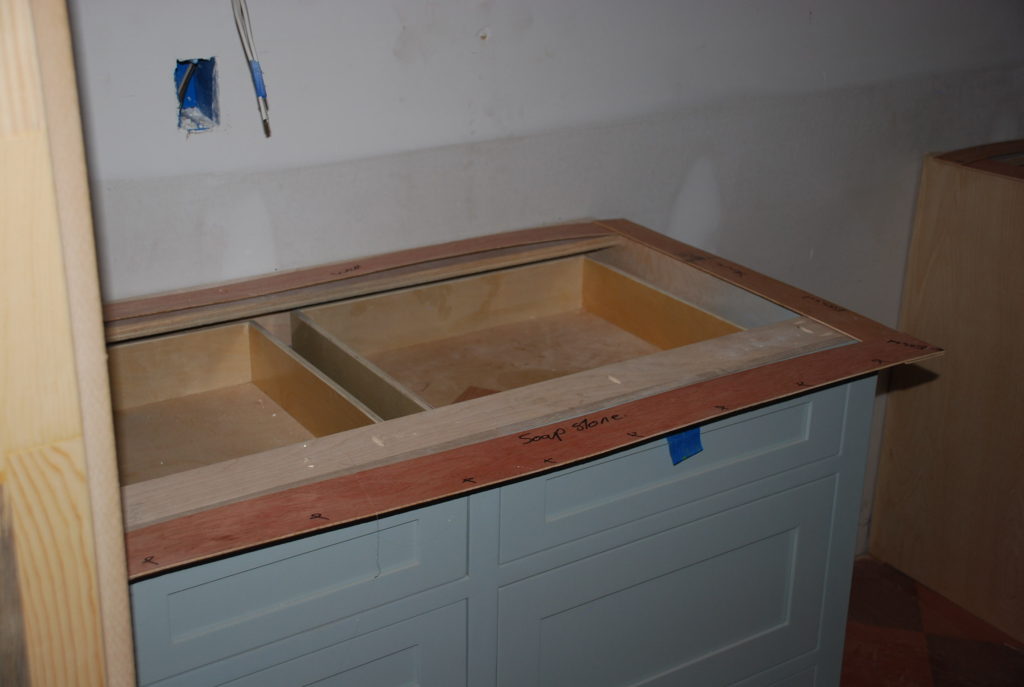
 The week started out on an exciting note – the stone subcontractor was by to create templates for all the countertops! We selected some slabs of stone that we want to use in several different places, and it was time for him come out and measure. Our sub, Hannes brought thin strips of wood and a hot-glue gun and put them on the cabinets the same way the countertops will eventually sit and glued the strips together. Once he gets back to the shop, they will use the template to draw out the stone slabs and it once they are cut, they will be exact matches for the cabinets. It’s not the 3d camera technology you’ve probably seen on TV, but it is the tried and true method that has been used for years and it works perfectly.
The cabinet contractor was also out trying to resolve a mysterious coloration issue with the cabinets. You may have noticed from previous photos that there’s a color difference between the upper cabinet doors and the frames. 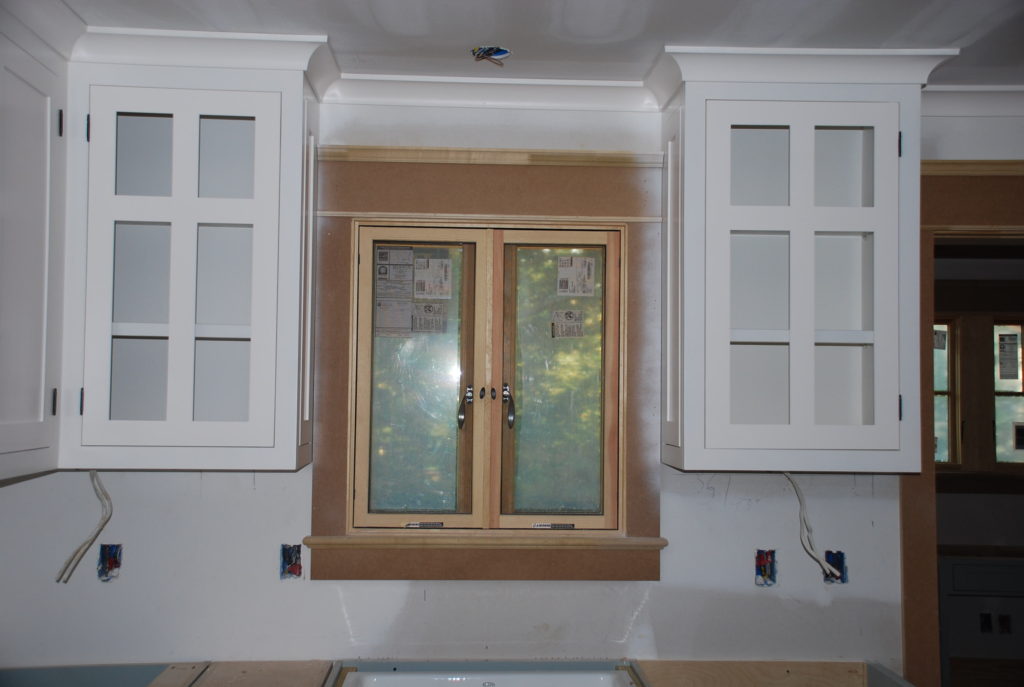 The frames are not quite as white as the doors and the crown moulding along the ceiling. After several additional coats of paint, I think we are getting close, but it is still a little off. He’ll get it figured out.
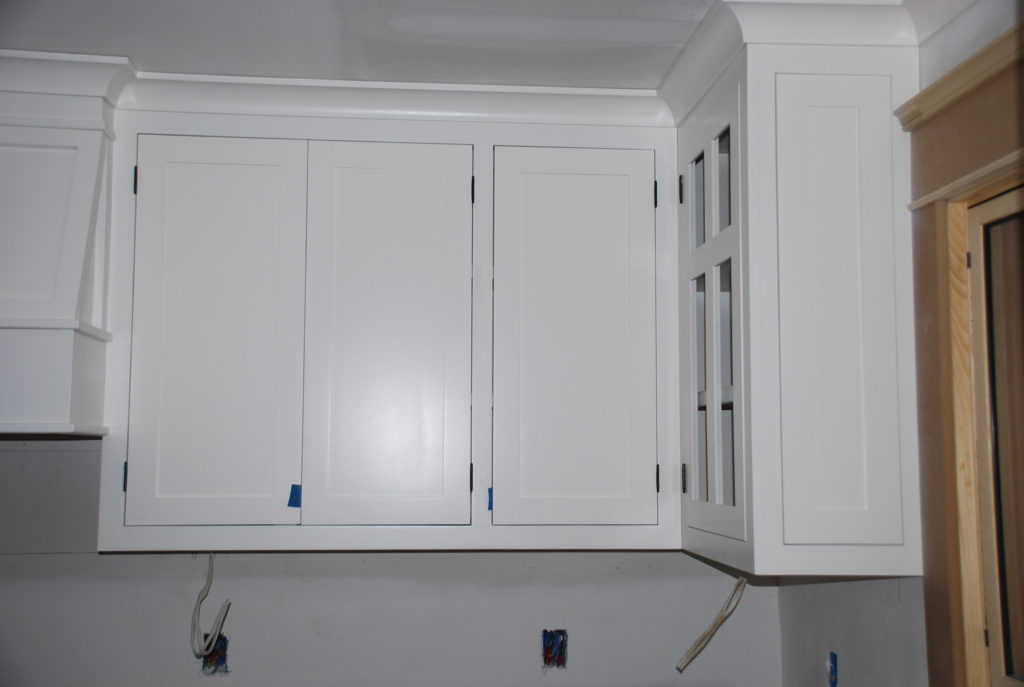 Also, Andrew laid out the wiring pattern for the heated floor to make sure we had enough wire to make it work. These are just black marker lines, but will give them a guide once they are ready to put the wires in.
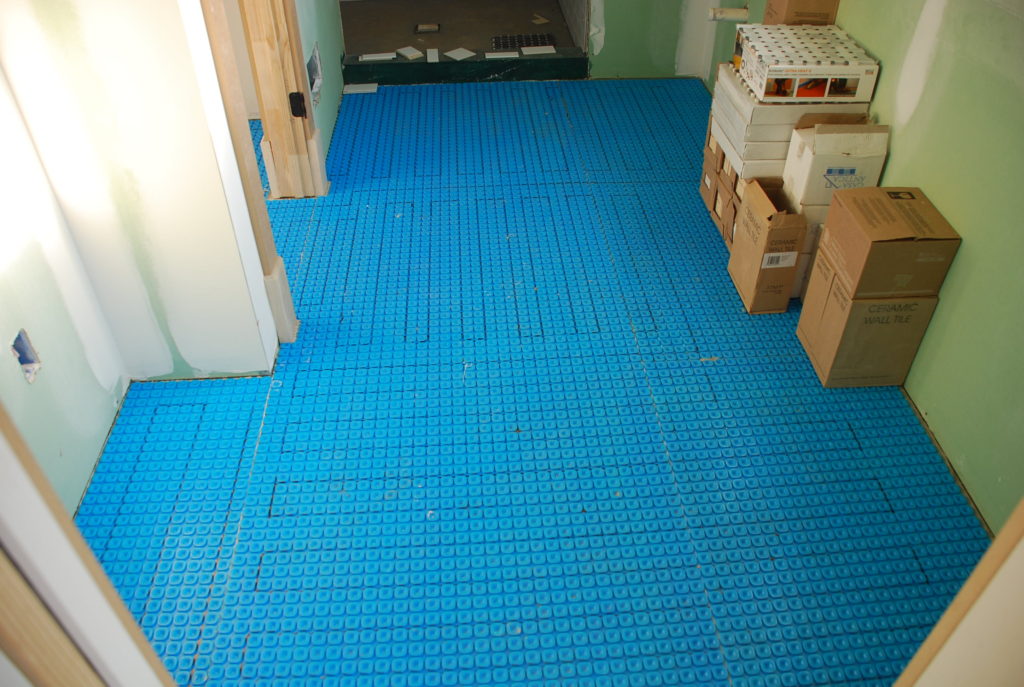 Viktor, our trim and built-in contractor was back to bring the drawers for the Master Closet built-in and to wrap up a few other loose ends.
  He also brought the cabinet for the media equipment in the Loft and trimmed it out to match the windows.
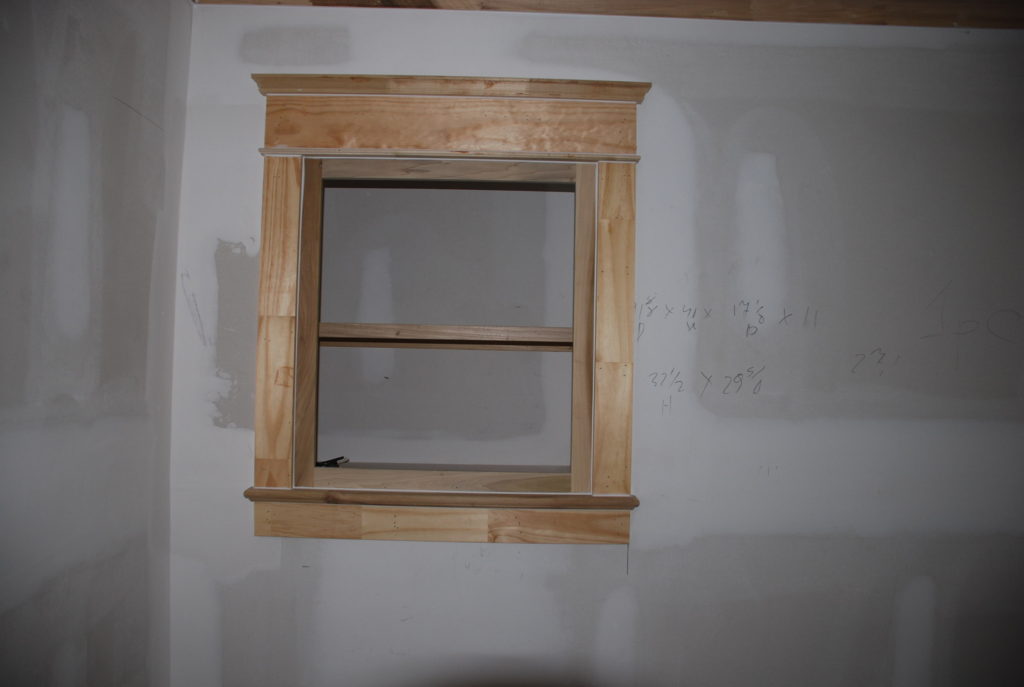 In Bedroom 2 we designed a built-in chest of drawers which he also installed.
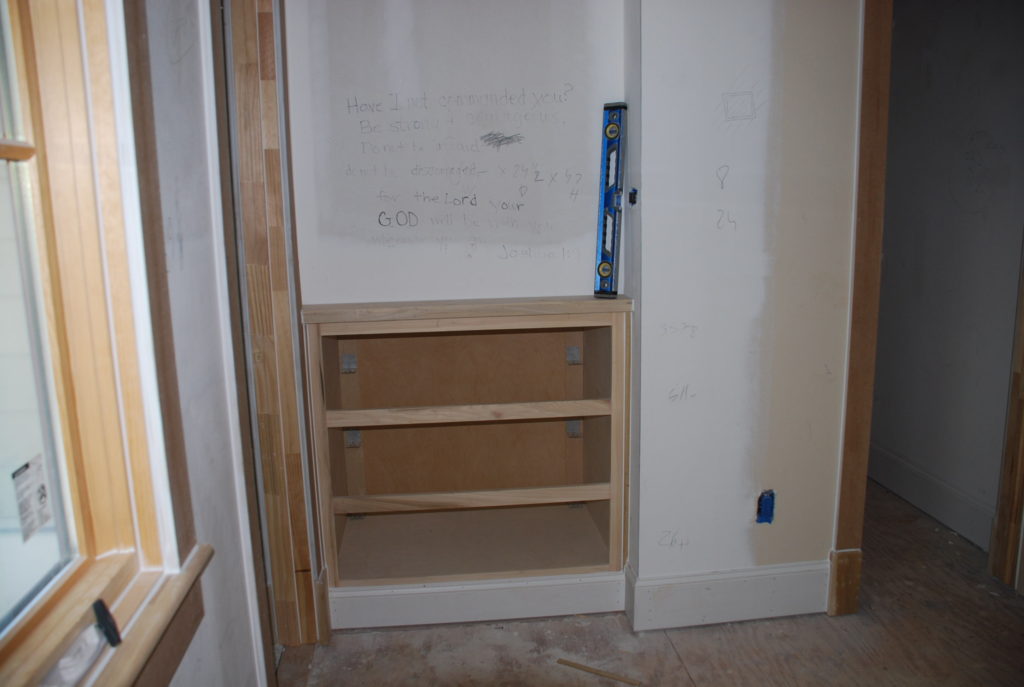 The Dining Room windows had not been trimmed yet because we were missing the corbels that go under the windows. Dale found a source for them and Viktor was able to finish the trim in there as well.
 Once the trim goes up, the painters begin caulking in all the joints. With all the trim we designed in, there is going to be an awful lot of caulking, and the painters were in this week working diligently to get everything caulked up so there are no cracks or gaps.
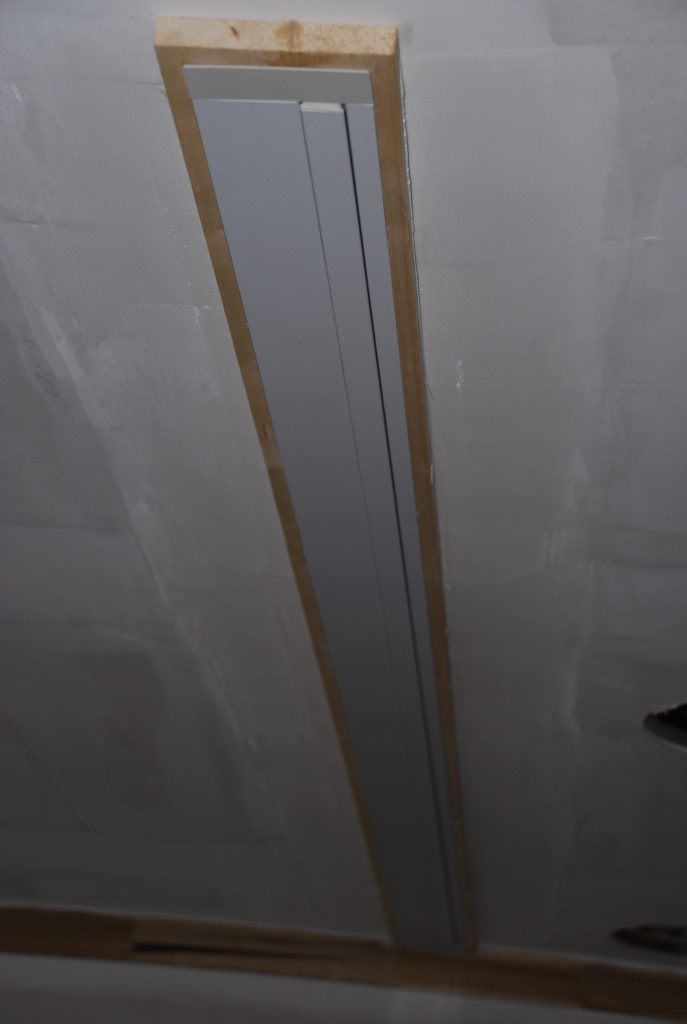
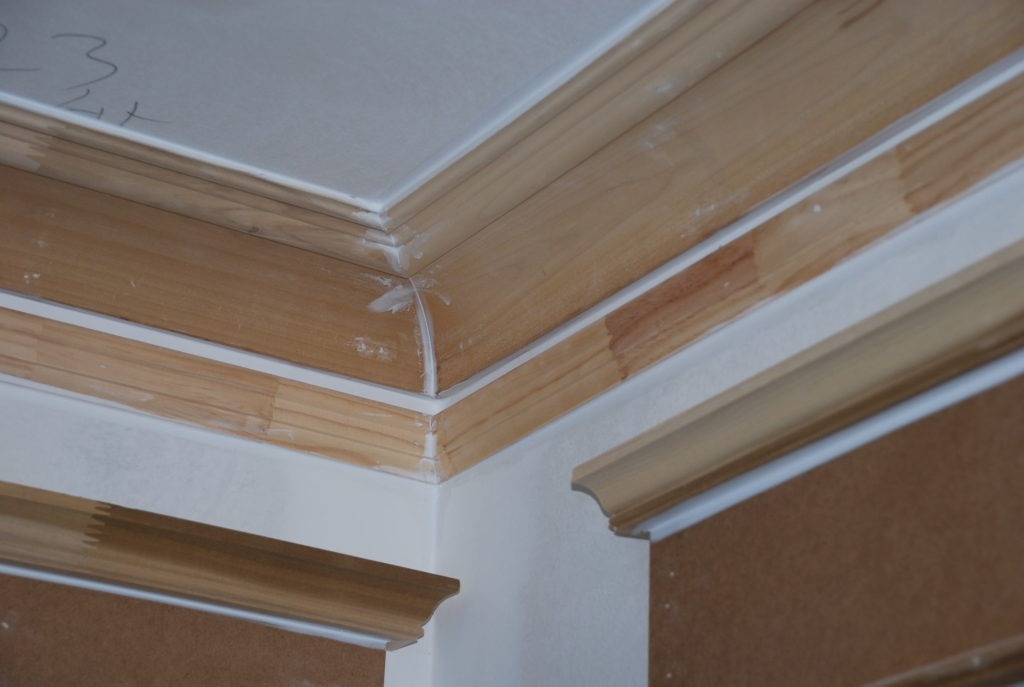 The Loft is going to be our ‘Media Room’ – complete with video projector and retractable screen. We’ve had the screen for quite some time in a box, but since it is positioned directly over the stairs, it is a little complicated to install. This week Tom and Andrew finally bit the bullet and put up some scaffolding and put it in place. The case and motor are recessed up in the attic space, so just the cover is exposed below the ceiling. We added some wood trim to make it easier to install and finish.
 Here’s the Loft cabinet showing caulking in all the joints. All of the trim has to be done the same way.
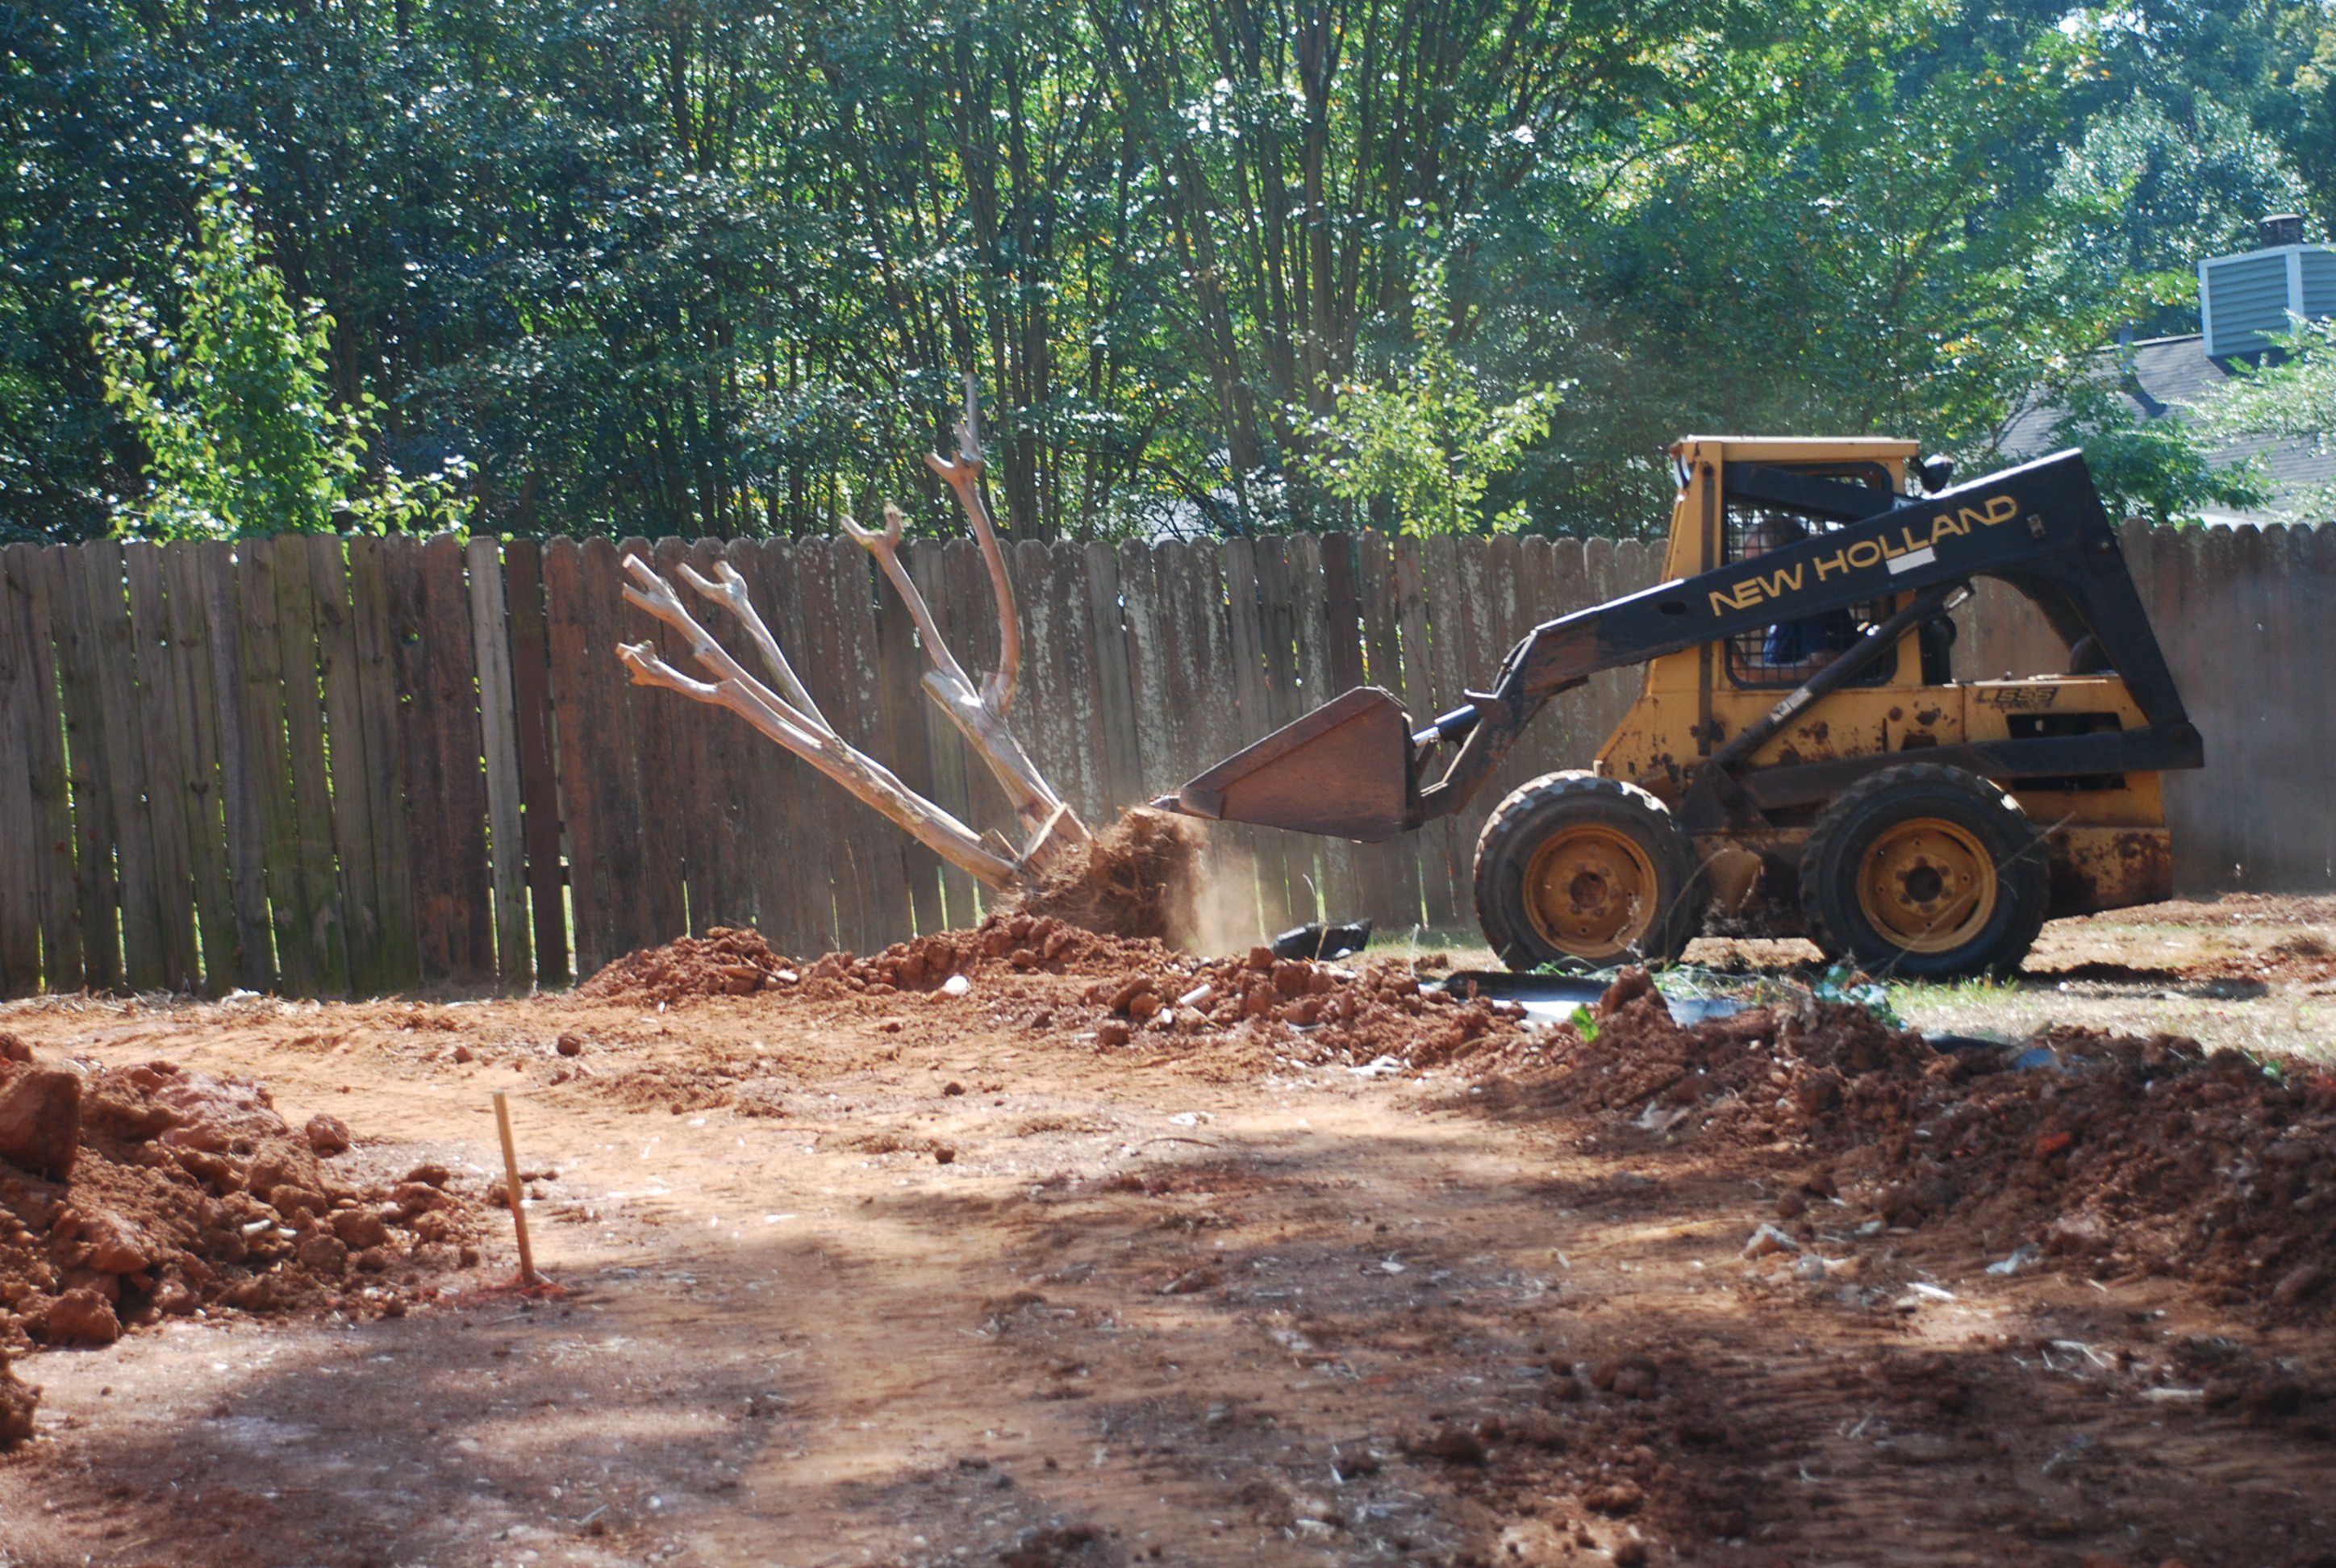
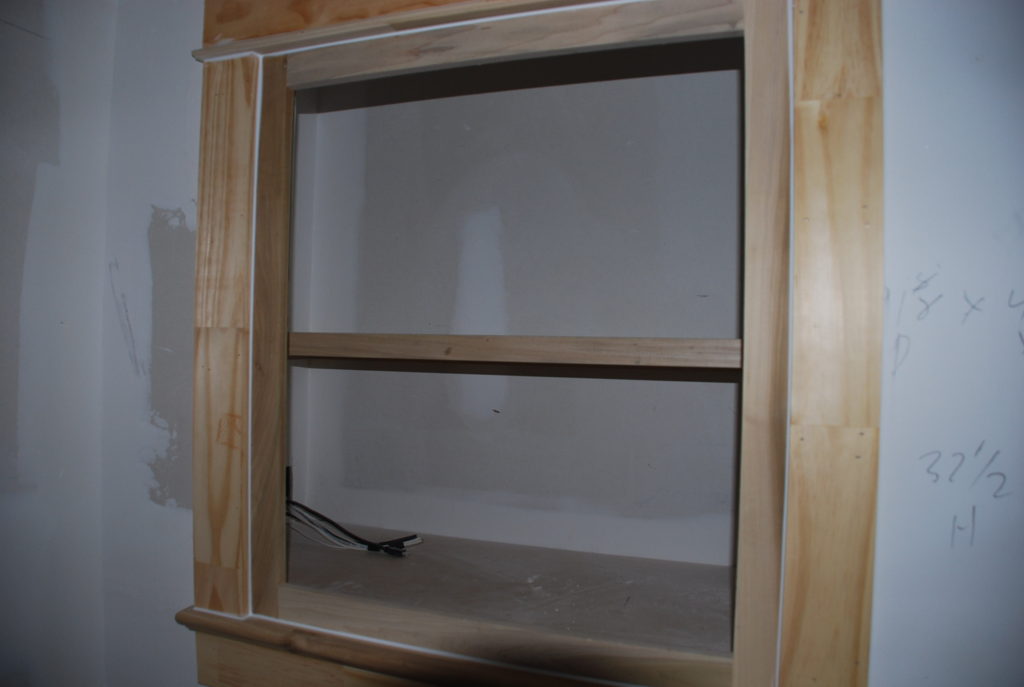 Just when we thought we’d hauled off all the dirt, when the driveway contractor came to prep for the concrete, they ended up cutting out even more dirt. So we have another pile, and I’m sure there will be more before we are finished. But the piles keep getting in the way – this time the pile is against the back of the house, and it is almost time to start working on the back deck. So, bring back the loader and move it again to another location that is out of the way.
 Once the dirt was moved it was time to start laying out the deck (see the stakes in the ground). We’ve talked about framing it ourselves, but are beginning to think our time will be better served working on other aspects of the project, and we’ll leave the deck to a professional.
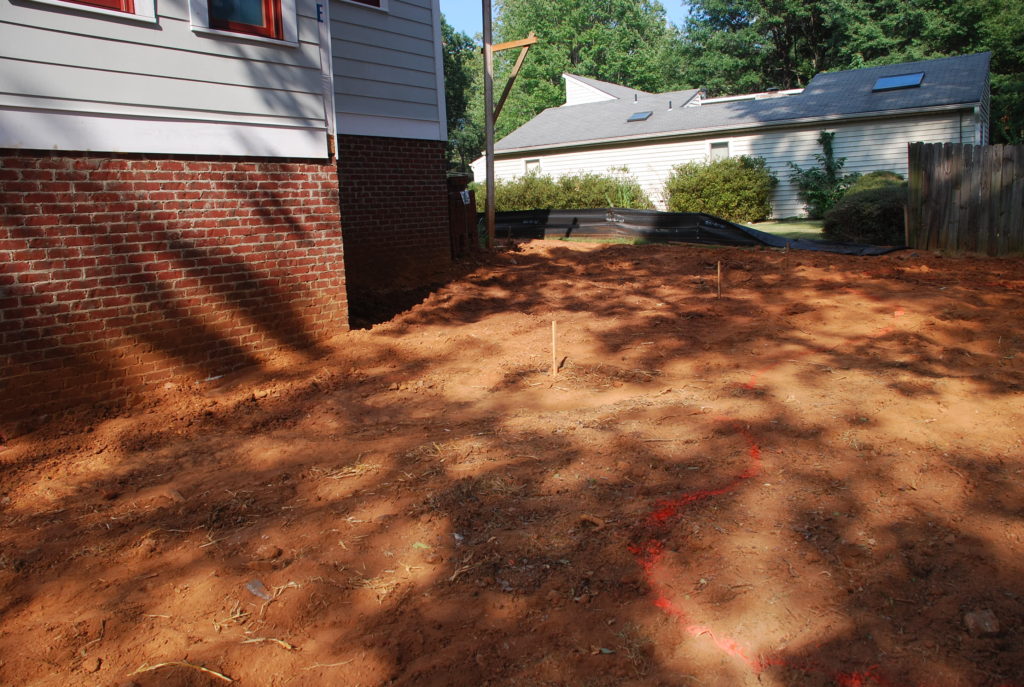 The orange paint on the dirt is the beginning of laying out a pond. Stand by for more about that next week.