Many ‘Craftsman’ houses have porch columns that are half masonry and then have a short tapered column on top. This is probably the most recognizable common denominator of this style.
Many homes have been built in recent years where the designer/builder/developer has taken a generic subdivision house and simply changed the classical front porch columns into tapered columns on a base – and marketed it as a ‘Craftsman’ design. However, a tapered column does not a ‘Craftsman Home’ make! What they have created is a Frankenstein House with parts and pieces that don’t go together and create a ‘style’ that is the antithesis of much of what ‘Arts & Crafts’ architecture was about – honesty and purity in design. But I digress . . .
Back to the columns – we wanted caps on top of the brick bases for the tapered columns to sit on and began looking at sources. Originally these caps were often made of stone, but more commonly they used what we now call ‘cast-stone’. It looks very much like a cut stone, but in fact is simply made of concrete or cement.
The cost of purchasing cast-stone pieces for what we needed for our design was astronomical, so we explored the option of making them ourselves. Tom let us know that he had made some for his own house and it was not that difficult. So we decided to pursue the homemade version!
I really didn’t want it to look like concrete, so we selected a color to add to the mix that would give it more of a sandstone look. We have the 4 columns, 2 post caps down by the motor court, and then 4 treads for the front porch steps – so that’s 12 pieces.
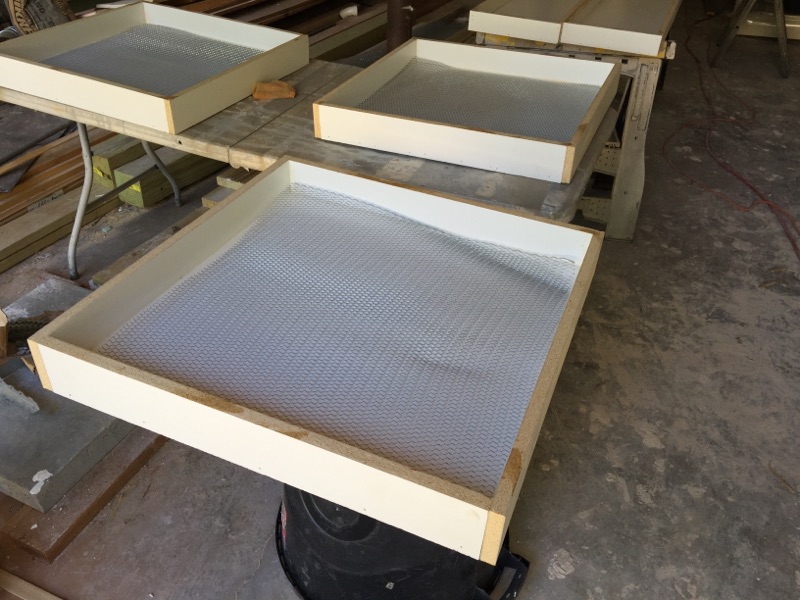
The first thing to do was create forms to pour the concrete into. Tom recruited David Shock to take the lead and he made forms for all the pieces so that they could pour them all at once. Below are forms for the caps along with some wire lath to help hold the concrete together and keep it from cracking as it cures.
 Being that we were using a color additive, we wanted to pour them all at the same time so that there would be less chance of variation in the color of the different pieces. The color was in powder form, and they carefully measured the amount for each batch they made.
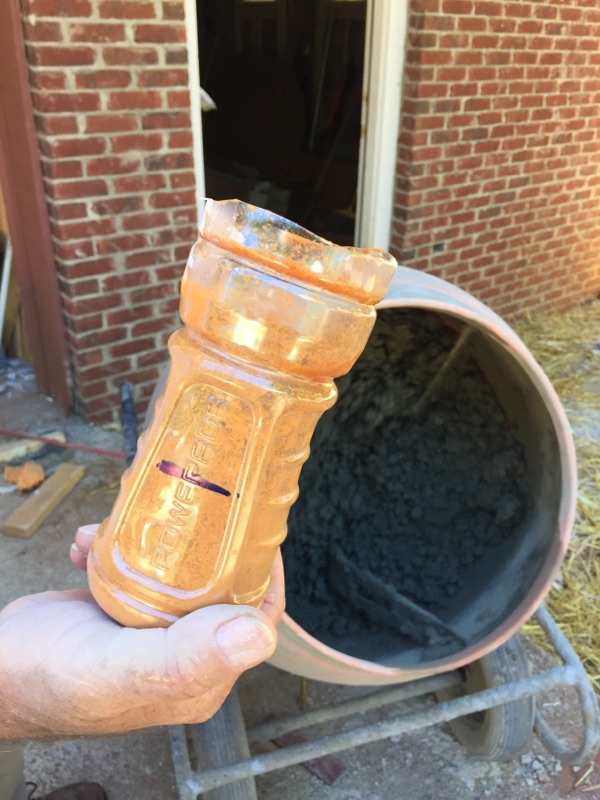 Using a motorized mixer, they mixed all the materials and the color and added water just like mixing concrete.
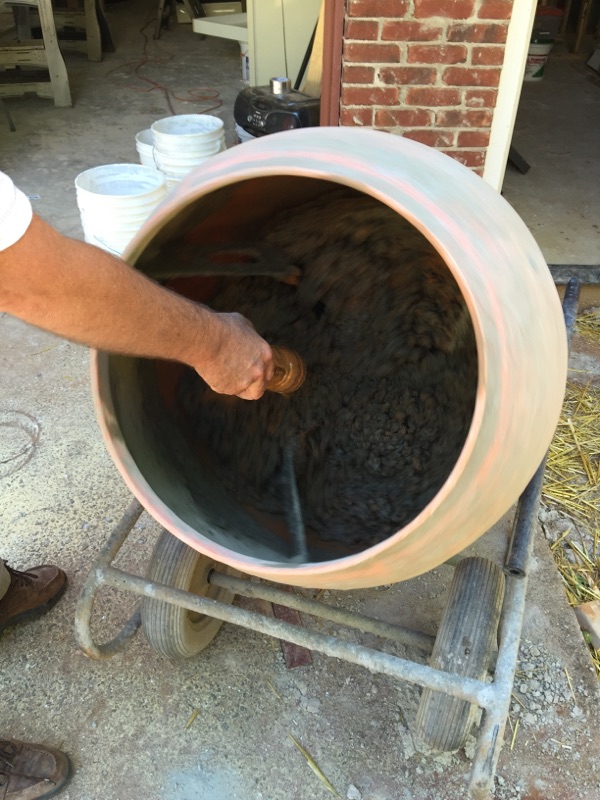 They filled the forms up with concrete and then used a reciprocating saw (without a blade) to vibrate the mix. This is a critical step to reduce the amount of air bubbles that get trapped down below.
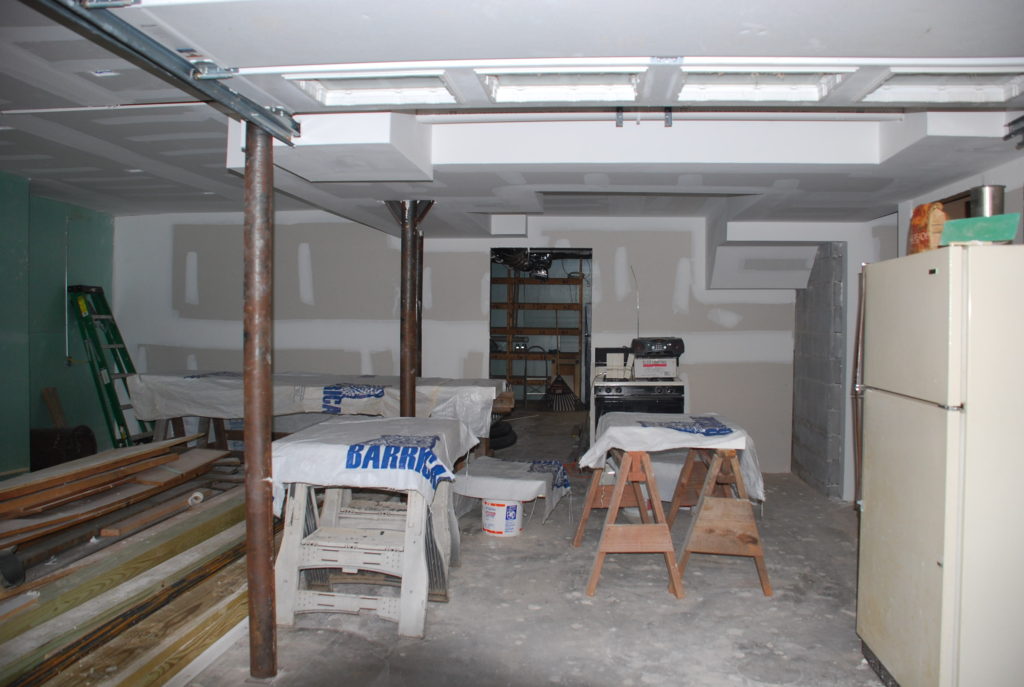
 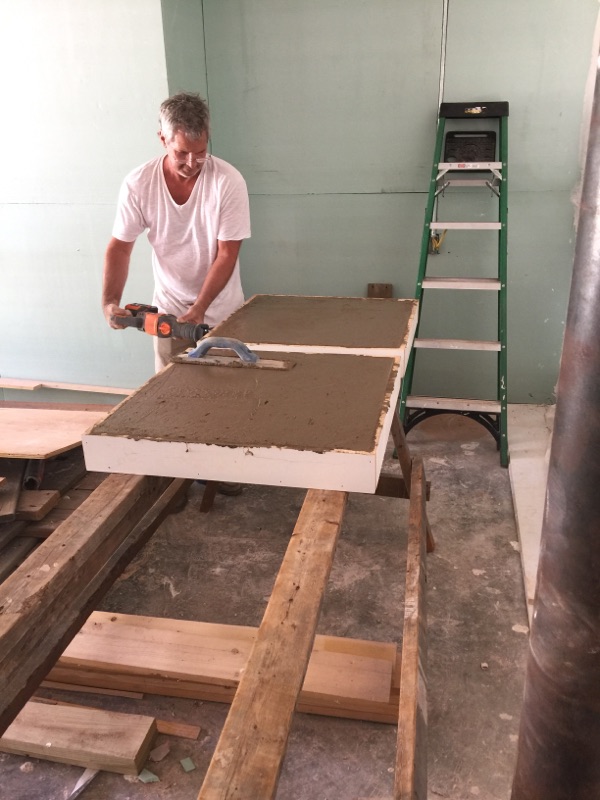 Before long all the forms were filled and it was time to wait for the concrete to cure. They set everything up in the basement – out of the weather.
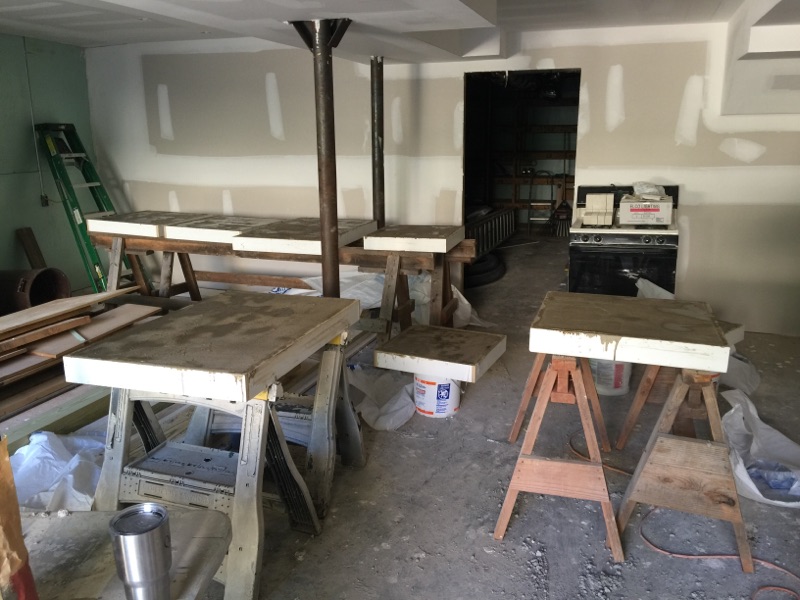 The Basement is also cool which is conducive for the concrete to cure slowly which should make for a stronger slab.
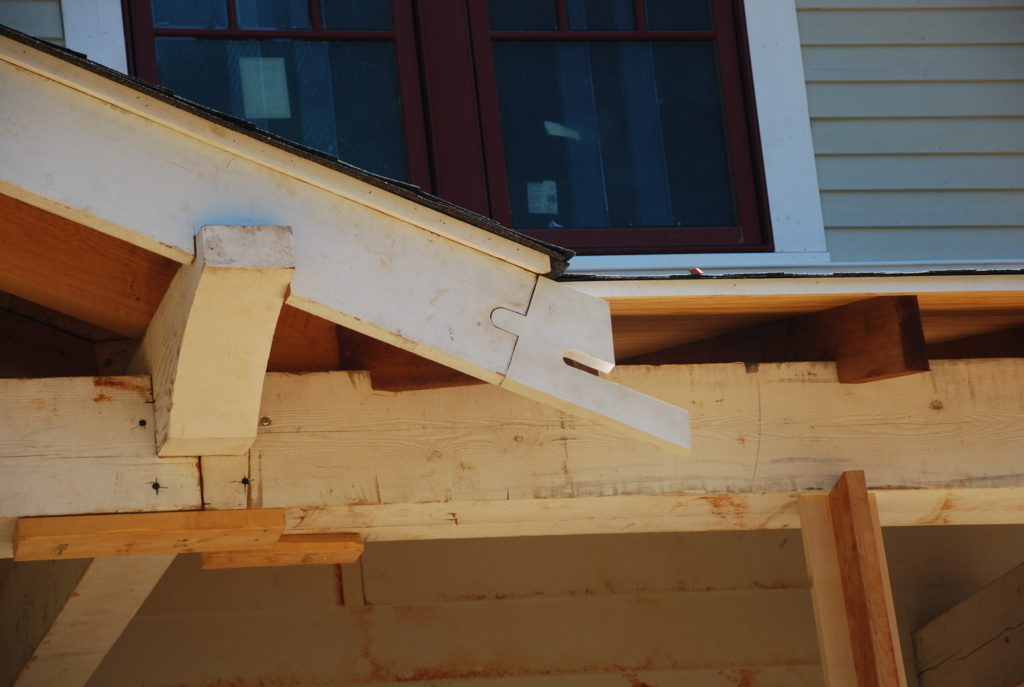
 The other project for the week was to make some modifications to the bargeboards at the Front Porch.
We had detailed out the front bargeboards a little differently than the larger ones for the main roof, and as soon as I saw them installed and trimmed out I knew that they weren’t quite right. The main problem was that they didn’t extend out beyond the edge of the roof like they should have, and the proportions of the bargeboard design and the rake mould were off.
So we discussed with Tom and Andrew what the easiest way would be to remedy the situation and we came up with the idea of chopping off the end and creating a new end piece that would fit into the slot that remained.
The first step was to cut the end off – perpendicular to the bargeboard, leaving a portion of the slot that was there originally. Earlier I had made a template of the old bargeboard end and figured out how to make the ‘puzzle pieces’ that would fit in the slot. 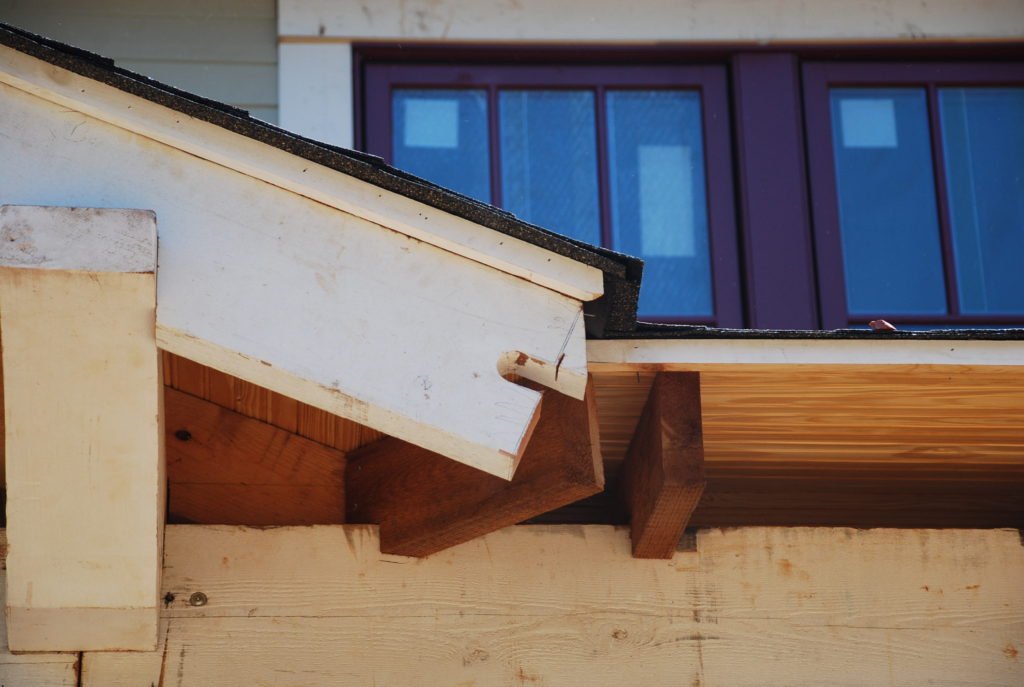 The bargeboards on the sides of the porch had to be cut to go with the lower pitched roof, and the ones in the gable had a higher angle.
 The puzzle pieces were a tight fit with just a little trimming required, and they fastened them securely with glue and screws.
 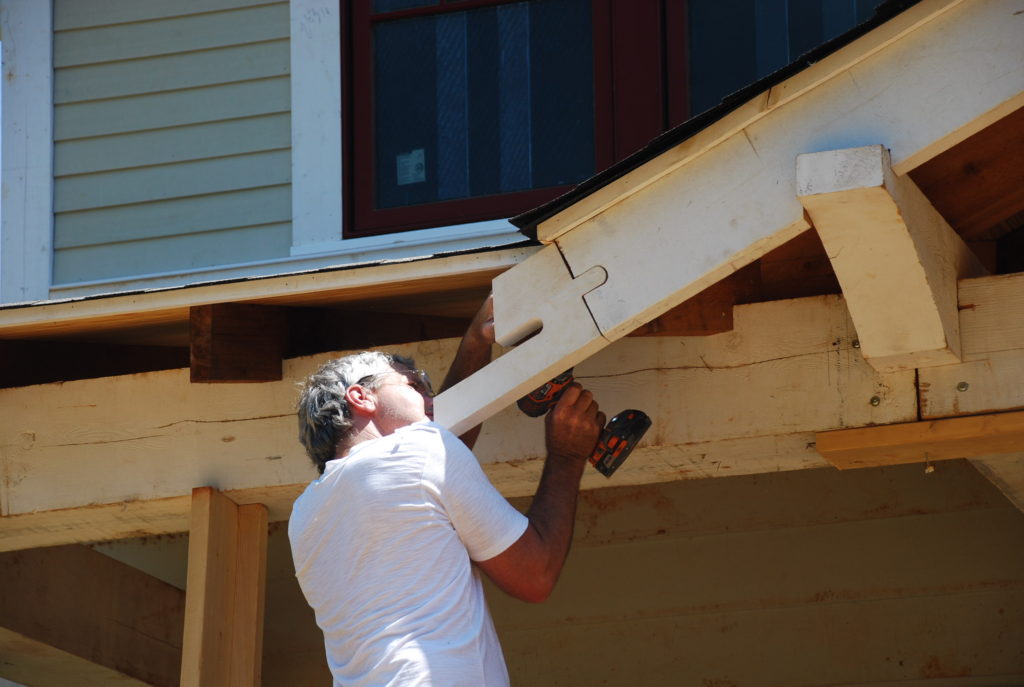 The wood texture was a bit different even though they were all made out of cedar and cut at the same mill. This one is going to take a little extra sanding to make them look alike.
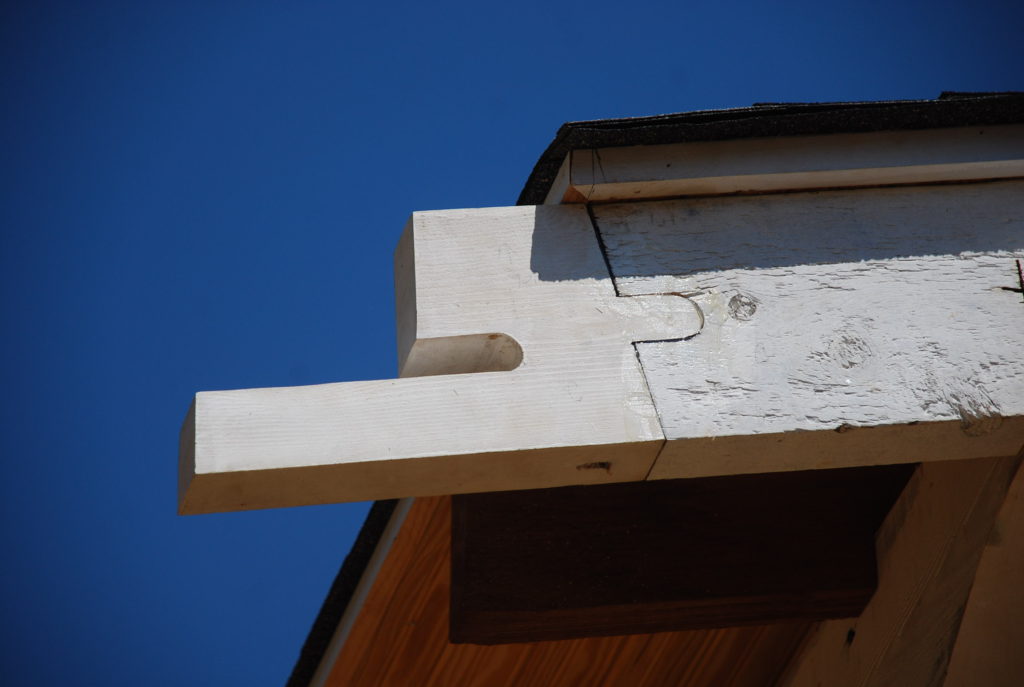 The next step will be to use epoxy filler and fill all the gaps and spaces and then sand them down.
 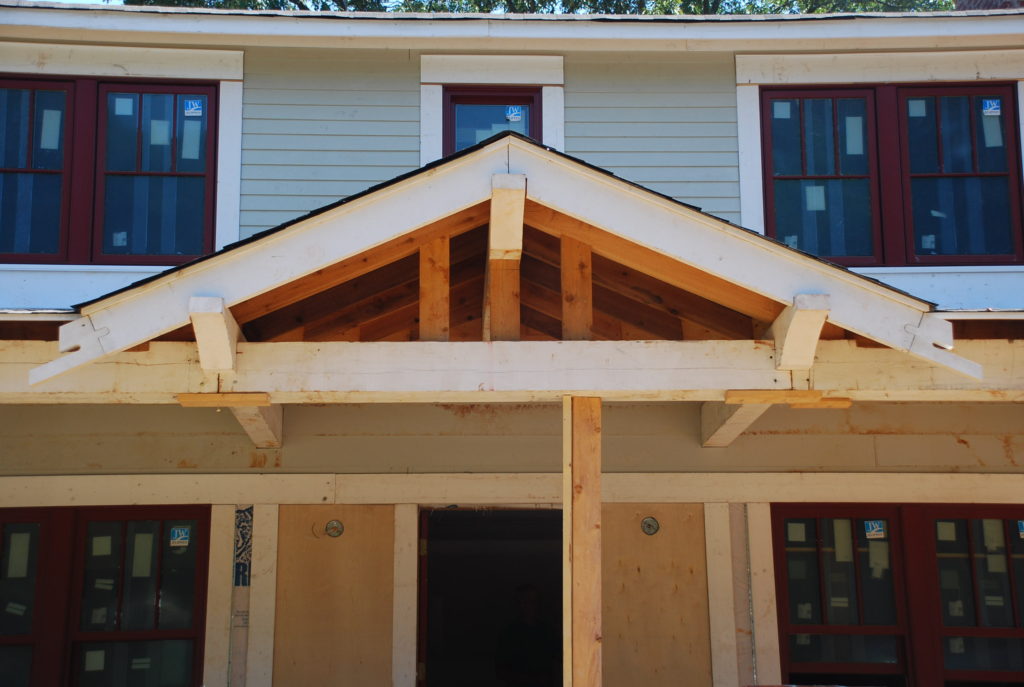 If all is done well, you will never be able to tell that they were changed.